

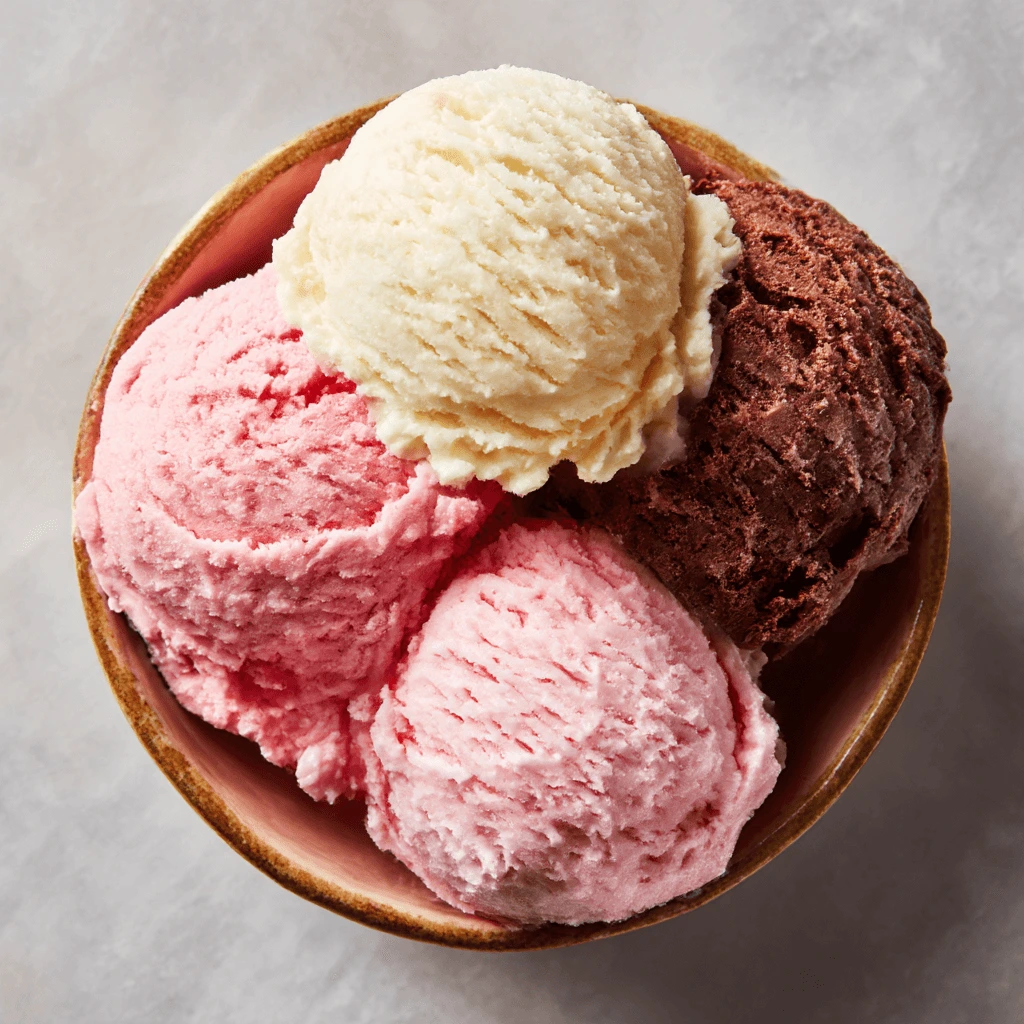
Few desserts are as iconic and nostalgic as Neapolitan ice cream. With its trio of chocolate, vanilla, and strawberry, this classic treat offers something for everyone in a single scoop. Whether you grew up enjoying it at birthday parties, summer picnics, or straight from the freezer, Neapolitan ice cream has a special way of bringing people together.
In this guide, you’ll learn exactly how to make homemade Neapolitan ice cream from scratch. We’ll cover the essential ingredients, step-by-step instructions, creative variations, and serving ideas to make your dessert shine. The best part? You don’t need to be a professional chef—just a few simple tools and pantry staples are all it takes to create this layered ice cream recipe that’s as beautiful as it is delicious.
By the end, you’ll not only know the history behind this beloved frozen dessert but also have your very own Neapolitan ice cream recipe ready to impress family and friends.
What Is Neapolitan Ice Cream?


A delicious Neapolitan ice cream cone stacked with three classic flavors: strawberry, vanilla, and chocolate.
Definition and the Three Classic Flavors (Chocolate, Vanilla, Strawberry)
At its core, Neapolitan ice cream is defined by its unique three-in-one combination of flavors—chocolate, vanilla, and strawberry—layered or arranged side by side in a single container. This arrangement gives the dessert its instantly recognizable striped appearance and offers variety in every scoop.
-
Chocolate: The rich, indulgent side of Neapolitan. It balances sweetness with a deep cocoa flavor and adds a darker color contrast to the trio. Chocolate appeals to those who crave a more decadent taste.
-
Vanilla: The most versatile of the three, vanilla brings a creamy, smooth base that pairs well with both the chocolate and strawberry layers. Its neutral flavor makes it the perfect “bridge” between the other two.
-
Strawberry: Offering a fruity, slightly tangy sweetness, the strawberry layer adds freshness and brightness to the mix. It also contributes the pink hue that makes Neapolitan ice cream visually striking.
What makes this definition special is that Neapolitan isn’t just about flavor—it’s also about choice. Some people dig into just their favorite layer, while others scoop across all three for a perfectly blended bite. This built-in variety is one of the key reasons Neapolitan ice cream has remained a timeless dessert classic across generations.
History and Origin of Neapolitan Ice Cream (Naples, Italy)
The story of Neapolitan ice cream begins in Naples, Italy, a city long celebrated for its contributions to food and culinary art. In the 19th century, Italian immigrants brought their ice cream-making traditions to Europe and the United States. These early artisans were skilled in creating gelato—Italy’s famously smooth and flavorful frozen dessert—and soon adapted their craft to local tastes abroad.
Originally, Neapolitan wasn’t strictly limited to chocolate, vanilla, and strawberry. In fact, many different flavors were layered together, sometimes inspired by seasonal fruits or regional specialties. Over time, however, chocolate, vanilla, and strawberry became the standard trio. This was largely because these three were the most popular and widely available flavors of the era—and together, they created a visually appealing contrast of brown, white, and pink.
By the late 1800s, Neapolitan ice cream had become a symbol of both innovation and nostalgia. It carried with it the artistry of Italian gelato makers while adapting to the new culinary landscape of America. The name Neapolitan itself is a nod of respect to the people of Naples, whose traditions shaped this layered dessert into what it is today.
Today, when people enjoy Neapolitan ice cream, they’re not just tasting three simple flavors—they’re experiencing a dessert with a rich cultural history that bridges Italy and the rest of the world.
Why It’s Called “Neapolitan” (Cultural Background)
The name “Neapolitan” comes directly from the word Napoli (Naples), the Italian city where the tradition of layered and flavored frozen desserts was first popularized. In the 18th and 19th centuries, Naples was known as a hub of culinary creativity, producing chefs and artisans who carried their knowledge abroad. When Italian immigrants began introducing ice cream to other parts of Europe and the United States, their creations became associated with their homeland.
At first, Neapolitan-style ice cream could feature a wide variety of flavors, often depending on seasonal fruits or available ingredients. The idea was to showcase the Italian love of variety, artistry, and balance in food. Over time, however, the trio of chocolate, vanilla, and strawberry became the standard combination. These three flavors were not only popular and widely accessible but also represented a visually pleasing contrast that made the dessert stand out in shops and homes alike.
By calling it Neapolitan, people were paying homage to the Italian culinary heritage and the influence of Neapolitan immigrants who helped shape modern ice cream culture. The name stuck, and today it continues to remind us that this beloved dessert is more than just three flavors—it’s a product of cultural exchange, tradition, and creativity.
Why It Remains a Timeless Dessert Favorite
Despite the endless variety of modern ice cream flavors—from salted caramel to cookie dough—Neapolitan ice cream continues to hold a special place in dessert culture. Its staying power comes from a mix of simplicity, nostalgia, and versatility that keeps it relevant across generations.
-
Something for Everyone: With chocolate, vanilla, and strawberry all in one package, Neapolitan guarantees that every family member or guest finds a flavor they love. Few desserts are this inclusive.
-
Nostalgic Appeal: For many, Neapolitan brings back memories of childhood birthday parties, family gatherings, or hot summer days when it was a freezer staple. It’s comfort food in frozen form.
-
Visual Appeal: The clean stripes of brown, white, and pink make it eye-catching on the plate, in a cone, or even in creative desserts like Neapolitan cake or milkshakes.
-
Versatility: It works as a scoopable treat, a base for sundaes, or an ingredient in layered desserts. Its adaptability ensures it never goes out of style.
Ultimately, Neapolitan ice cream endures because it’s more than just a dessert—it’s a shared experience. It bridges generations, offering the same joy to children today as it did to their grandparents decades ago. That sense of tradition, combined with its simple yet satisfying flavors, is why it remains a timeless dessert favorite.
Ingredients You’ll Need for Homemade Neapolitan Ice Cream

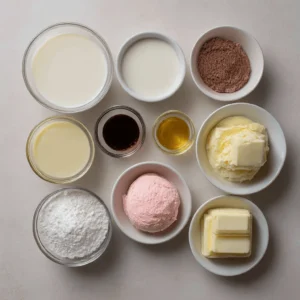
Essential ingredients for making Neapolitan ice cream at home, featuring the classic trio of chocolate, vanilla, and strawberry flavors.
Vanilla Layer (Milk, Cream, Vanilla Extract)
The vanilla layer is the smooth and creamy foundation of any Neapolitan ice cream recipe. Its mild flavor balances the richness of chocolate and the fruity brightness of strawberry, making it the “bridge” that ties all three flavors together.
-
Milk & Cream: The base starts with a blend of whole milk and heavy cream. This combination creates the rich, silky texture ice cream is known for. Milk lightens the mixture, while cream provides the fat needed for creaminess.
-
Vanilla Extract: A high-quality vanilla extract (or even vanilla bean paste for extra flavor) gives this layer its signature aroma and taste. The warm, sweet notes of vanilla pair perfectly with both chocolate and strawberry.
-
Sugar: A touch of sugar is added to balance the creaminess with just the right amount of sweetness.
-
Eggs (optional): Some recipes use egg yolks to create a custard-style base, which makes the vanilla layer even smoother and more indulgent.
When churned and frozen, this mixture transforms into a classic vanilla ice cream—soft, creamy, and subtly sweet. It provides the neutral yet comforting contrast that makes Neapolitan so enjoyable. Without this layer, the trio wouldn’t have the same harmony.
Chocolate Layer (Cocoa Powder, Melted Chocolate)
The chocolate layer brings richness and depth to Neapolitan ice cream, offering a bold contrast to the light vanilla and fruity strawberry. It’s the indulgent part of the trio that appeals to chocolate lovers and gives the dessert its balance of flavors.
-
Cocoa Powder: Unsweetened cocoa powder provides an intense chocolate flavor without making the mixture overly sweet. It also helps deepen the color, giving the ice cream its classic dark-brown hue.
-
Melted Chocolate: Adding melted chocolate (semi-sweet or dark) enhances creaminess and creates a more luxurious, fudgy texture. Together with cocoa, it delivers both immediate sweetness and lingering richness.
-
Milk & Cream Base: Just like the vanilla layer, a mixture of whole milk and heavy cream forms the base. The fat in the cream ensures that the chocolate stays smooth rather than grainy.
-
Sweetener: Sugar balances the bitterness of cocoa, while keeping the flavor bold but not overwhelming.
When churned, this blend becomes a decadent chocolate ice cream—smooth, creamy, and slightly bittersweet. It anchors the Neapolitan combination, adding a strong flavor dimension that complements both the vanilla’s subtle creaminess and the strawberry’s light fruitiness.
This layer is often the “favorite slice” of the trio for those who love indulgent desserts, and it’s what gives Neapolitan ice cream its truly satisfying character.
Strawberry Layer (Fresh Strawberries, Sugar, Puree)
The strawberry layer is the bright and fruity counterpart in Neapolitan ice cream, adding a splash of color and a refreshing taste that balances the richness of chocolate and the creaminess of vanilla. It’s often the most eye-catching part of the trio, thanks to its natural pink hue.
-
Fresh Strawberries: Using ripe, in-season strawberries is key to getting the best flavor. Fresh berries provide natural sweetness and a vibrant color that makes this layer stand out. If fresh berries aren’t available, high-quality frozen strawberries can also be used.
-
Sugar: A touch of sugar enhances the strawberries’ natural flavor and reduces tartness. It also helps release juices during cooking, creating a smooth and flavorful base.
-
Puree: Blending the strawberries into a puree ensures a silky texture. You can strain the mixture to remove seeds for an extra-smooth finish, or leave them in for a more rustic, homemade feel.
-
Cream & Milk: Just like the other layers, adding cream and milk creates the rich, creamy consistency that makes it ice cream rather than sorbet.
When churned and frozen, this mixture becomes a sweet, fruity strawberry ice cream—soft, refreshing, and lightly tangy. It’s the flavor that brightens the Neapolitan combination, making every bite feel fresh and balanced.
Together with the chocolate and vanilla layers, the strawberry base completes the iconic trio that has made Neapolitan a favorite for generations.
Common Pantry Staples (Sugar, Eggs, Heavy Cream)
While each layer of Neapolitan ice cream has its own unique ingredients, there are a few common staples that tie the recipe together and ensure all three flavors share the same smooth, creamy base. These simple pantry essentials are what transform flavored mixtures into authentic, scoopable ice cream.
-
Sugar: Beyond adding sweetness, sugar lowers the freezing point of the mixture, preventing it from turning rock-hard in the freezer. This ensures the ice cream stays soft and scoopable, with just the right balance of flavor across the chocolate, vanilla, and strawberry layers.
-
Eggs: Many traditional ice cream recipes use egg yolks to create a custard-style base. Yolks thicken the mixture, add richness, and give the ice cream a silky, velvety texture. They also act as a natural emulsifier, helping the fat and liquid combine smoothly. (For an egg-free version, you can skip them, but you may sacrifice some creaminess.)
-
Heavy Cream: Cream is the heart of any ice cream recipe. Its fat content delivers that luscious, melt-in-your-mouth consistency. Without heavy cream, the texture would be closer to ice milk or sorbet, lacking the indulgent creaminess that defines Neapolitan ice cream.
Together, sugar, eggs, and heavy cream provide the backbone of the recipe. They allow the chocolate, vanilla, and strawberry flavors to shine while ensuring the final result is rich, creamy, and satisfying—exactly what you expect from a homemade Neapolitan ice cream.
Step-by-Step Guide to Making Neapolitan Ice Cream
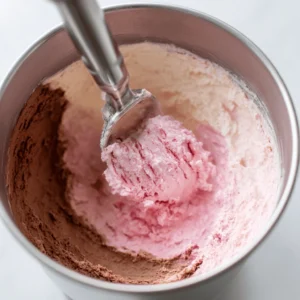
Homemade Neapolitan ice cream being scooped, showing the three classic flavors—strawberry, vanilla, and chocolate—layered together.
Preparing the Vanilla Base
The vanilla base is the starting point for most homemade ice cream recipes and serves as the foundation of your Neapolitan ice cream. It’s smooth, creamy, and mild in flavor, making it the perfect “middle ground” between the bold chocolate and fruity strawberry layers. Preparing it properly ensures the whole dessert has the right texture and balance.
-
Heat the Dairy: In a saucepan, combine whole milk and heavy cream. Warm gently over medium heat until small bubbles form around the edges—avoid boiling, as this can scorch the mixture.
-
Mix the Egg Yolks and Sugar: In a separate bowl, whisk egg yolks with sugar until pale and slightly thickened. This step not only sweetens the base but also adds structure, ensuring the final ice cream is rich and custardy.
-
Temper the Eggs: Slowly pour a bit of the warm milk-and-cream mixture into the egg yolks while whisking constantly. This prevents the eggs from curdling. Then, return the tempered yolk mixture to the saucepan.
-
Cook into a Custard: Continue cooking on low heat, stirring constantly, until the mixture thickens enough to coat the back of a spoon. This custard base is the secret to that velvety, creamy vanilla texture.
-
Add Vanilla: Remove from heat and stir in pure vanilla extract (or vanilla bean paste for an even richer flavor).
-
Chill and Churn: Let the base cool completely in the fridge, then churn in your ice cream maker until thick and creamy. This becomes your first layer in the Neapolitan trio.
The vanilla base not only creates a luscious standalone ice cream but also provides a neutral anchor that balances the richness of chocolate and the brightness of strawberry in the final Neapolitan combination.
Making the Chocolate Flavor
The chocolate layer is where your Neapolitan ice cream gets its boldness and richness. It delivers a deep cocoa taste that contrasts perfectly with the light vanilla and fruity strawberry layers. Making it requires a few simple steps to ensure the flavor is smooth, creamy, and indulgent.
-
Prepare the Cocoa Mixture: In a small saucepan, whisk together unsweetened cocoa powder, sugar, and a splash of milk until smooth. Heating the cocoa gently helps dissolve it fully and prevents any grainy texture in the final ice cream.
-
Add Melted Chocolate: Stir in melted semi-sweet or dark chocolate for an extra layer of richness. This not only deepens the flavor but also adds body and creaminess to the mixture.
-
Combine with Dairy: Slowly mix the cocoa-chocolate blend into a base of warm milk and heavy cream. The fat from the cream helps round out the sharpness of cocoa, creating a balanced flavor.
-
Optional Custard Style: For a custard-like texture, you can whisk in egg yolks (tempered, as you did with the vanilla base) and cook until slightly thickened. This gives the chocolate ice cream a velvety smooth finish.
-
Chill and Churn: Allow the chocolate mixture to cool completely, then churn it in your ice cream maker until creamy. This becomes the second layer of your Neapolitan ice cream.
The result is a decadent chocolate ice cream—rich, fudgy, and satisfying—that anchors the Neapolitan trio. It brings depth and indulgence, ensuring every scoop has that classic contrast of flavors.
Preparing the Strawberry Mixture
The strawberry layer adds a fruity brightness to Neapolitan ice cream, balancing the richness of chocolate and the creaminess of vanilla. Its naturally sweet, slightly tangy flavor makes the whole trio feel refreshing and colorful. Preparing it the right way ensures a smooth, vibrant layer that stands out in both taste and appearance.
-
Choose Your Strawberries: Fresh, ripe strawberries work best because they provide natural sweetness and a bold pink color. If fresh berries aren’t in season, frozen strawberries are a great substitute—just thaw and drain them first.
-
Cook the Berries with Sugar: In a saucepan, combine chopped strawberries with a little sugar and lemon juice. Simmer until the berries release their juices and soften. This step intensifies the flavor and ensures the mixture won’t be icy when frozen.
-
Blend into a Puree: Once cooled slightly, transfer the strawberry mixture to a blender or food processor and puree until smooth. For an extra refined texture, strain through a sieve to remove seeds, though some prefer leaving them in for a rustic feel.
-
Combine with Dairy: Stir the puree into a base of milk and cream, just like the vanilla and chocolate layers. The cream ensures the strawberry layer is soft and scoopable instead of turning into a sorbet.
-
Chill and Churn: Refrigerate until cold, then churn in your ice cream maker. The mixture will thicken into a creamy, fruity strawberry ice cream that’s ready to layer with chocolate and vanilla.
This process creates the bright, refreshing third layer of Neapolitan ice cream, bringing balance and color to the dessert. It’s what makes every scoop taste like summer in a bowl.
Layering the Three Flavors in a Loaf Pan
Once you’ve prepared your vanilla, chocolate, and strawberry bases, the magic of Neapolitan ice cream comes from how they’re layered together. This step transforms three individual ice creams into the iconic striped dessert that’s instantly recognizable.
-
Choose Your Pan: A standard 9×5-inch loaf pan works perfectly for layering. Its rectangular shape helps keep the flavors in neat, defined sections. You can also use a freezer-safe container with straight edges for a more professional look.
-
Start with the First Layer: Pour in one flavor (commonly vanilla, but you can choose any order) and spread it evenly with a spatula. Tap the pan gently on the counter to remove air bubbles.
-
Add the Next Flavor: Spoon the second ice cream layer directly beside or on top of the first, depending on your preferred look. Some people like stacking layers vertically, while others prefer the traditional side-by-side arrangement where all three flavors are visible in every slice.
-
Finish with the Third Flavor: Add the final ice cream layer, smoothing the top for a polished finish. If layering side by side, make sure the sections touch but don’t mix too much—you want clean, distinct stripes.
-
Freeze Until Firm: Cover the loaf pan with plastic wrap or foil and freeze for at least 4–6 hours (overnight is best) to let the layers set.
The result is the classic Neapolitan look: a striped block of chocolate, vanilla, and strawberry that can be sliced, scooped, or even used in cakes and sundaes. Not only does this technique showcase the three flavors beautifully, but it also gives you that nostalgic dessert experience that has delighted families for generations.
If you’ve never made ice cream at home, this ice cream guide to making ice cream at home<www.seriouseats.com> explains the basics of creating creamy, churned desserts without hassle.
Variations and Creative Twists on Neapolitan Ice Cream

Delicious cones of Neapolitan ice cream styled in different ways, featuring chocolate drizzle, strawberry swirls, and whipped toppings.
No-Churn Neapolitan Ice Cream (Easy Version Without Machine)
Not everyone owns an ice cream maker—and the good news is, you don’t need one to make a delicious Neapolitan ice cream at home. With the no-churn method, you can still achieve creamy, scoopable layers of chocolate, vanilla, and strawberry using just a few simple ingredients and tools.
-
Whip the Cream: Start by whipping heavy cream until soft peaks form. This incorporates air into the mixture, mimicking the churning process of an ice cream machine.
-
Sweeten with Condensed Milk: Fold in sweetened condensed milk, which adds sweetness and prevents the ice cream from freezing too hard. This becomes your base for all three flavors.
-
Divide and Flavor: Separate the base into three bowls.
-
Add vanilla extract to one bowl for the vanilla layer.
-
Mix cocoa powder (and melted chocolate if desired) into the second bowl for the chocolate layer.
-
Blend strawberry puree or strawberry jam into the third bowl for the strawberry layer.
-
-
Layer in a Loaf Pan: Spread each flavored mixture into a loaf pan side by side or in stacked layers, smoothing the top as you go.
-
Freeze Until Firm: Cover with plastic wrap or foil and freeze for at least 6 hours or overnight.
The result is a rich, creamy, no-churn Neapolitan ice cream that looks and tastes just as good as the traditional version. It’s quick, beginner-friendly, and perfect for anyone who wants to make homemade ice cream without special equipment.
Neapolitan Ice Cream Cake or Loaf Dessert
One of the most creative ways to enjoy Neapolitan ice cream is by turning it into a layered ice cream cake or loaf dessert. This twist highlights the trio of chocolate, vanilla, and strawberry in a striking presentation, making it perfect for birthdays, summer gatherings, or any celebration where you want to impress guests.
-
Prepare the Base: Start with a standard loaf pan or cake tin lined with plastic wrap or parchment paper. This makes it easy to remove the dessert once frozen.
-
Layer the Flavors: Spread softened vanilla ice cream evenly across the bottom of the pan and smooth it out. Freeze for 15–20 minutes before adding the chocolate layer. Repeat the process with chocolate and then strawberry, freezing between layers to keep them neat and defined.
-
Add a Crust or Cake Layer (Optional): For extra texture, press crushed cookies (like Oreos or graham crackers) or a thin sponge cake into the bottom or between layers. This turns it into a full-fledged ice cream cake rather than just layered ice cream.
-
Decorate the Top: Finish with whipped cream, chocolate drizzle, fresh strawberries, or sprinkles for a festive look.
-
Slice and Serve: Once frozen solid (about 4–6 hours or overnight), lift the dessert from the pan and slice into beautiful striped servings that showcase the chocolate, vanilla, and strawberry layers.
This Neapolitan ice cream loaf cake is both playful and elegant—a dessert that’s easy to prepare yet stunning enough for special occasions. It takes the nostalgia of the classic three-flavor ice cream and transforms it into a centerpiece-worthy treat.
Healthier Substitutions (Low-Sugar, Dairy-Free)
One of the great things about making Neapolitan ice cream at home is that you can easily adapt it to suit different dietary needs without losing the classic trio of flavors. Whether you’re trying to cut back on sugar, reduce calories, or avoid dairy, there are plenty of substitutions to keep this dessert lighter and more inclusive.
-
Low-Sugar Options:
-
Swap regular sugar for natural sweeteners like stevia, monk fruit, or erythritol.
-
Use dark chocolate (70% or higher) in the chocolate layer to reduce added sugars.
-
Sweeten the strawberry layer with just ripe fruit or a small drizzle of honey instead of processed sugar.
-
-
Dairy-Free Choices:
-
Replace heavy cream with coconut cream, almond milk, or oat milk for a plant-based base.
-
Coconut cream works especially well in the strawberry layer, adding natural richness and a tropical note.
-
Choose dairy-free chocolate or cocoa powder for the chocolate portion.
-
-
Egg-Free Alternative:
-
Instead of using eggs to create a custard base, try the no-churn method with whipped coconut cream or aquafaba (the liquid from canned chickpeas) to add structure.
-
-
Health Boosters:
-
Blend in chia seeds or flaxseed meal for extra fiber.
-
Add unsweetened Greek yogurt (dairy or plant-based) for a protein boost and tangy flavor.
-
By making these healthier substitutions, you can enjoy a creamy, flavorful Neapolitan ice cream that feels indulgent while aligning with your lifestyle—whether you’re watching your sugar intake, avoiding dairy, or just looking for a lighter summer treat.
Fun Add-Ins (Nuts, Sprinkles, Chocolate Chips)
One of the easiest ways to make Neapolitan ice cream even more exciting is by adding a few fun mix-ins. These additions not only enhance the flavors and textures but also make your homemade dessert more playful and customizable for different occasions.
-
Nuts: Chopped nuts like almonds, pecans, or walnuts add crunch and a slightly salty contrast to the sweet layers. They work especially well in the chocolate portion for a brownie-like vibe or in the strawberry section for a nutty-fruity combination. Toasting the nuts beforehand brings out extra flavor.
-
Sprinkles: A favorite for kids (and adults, too!), colorful sprinkles turn Neapolitan ice cream into a festive treat. They’re perfect for birthday parties, summer BBQs, or any time you want to make dessert feel more fun and celebratory.
-
Chocolate Chips: Mini chocolate chips or chunks can be folded into any of the three layers. They provide bursts of rich chocolate flavor and a crunchy texture that balances the creamy base. White chocolate chips in the strawberry layer, for example, give a strawberries-and-cream twist.
-
Other Creative Add-Ins: Crushed cookies, caramel swirls, or even shredded coconut can take your Neapolitan creation to the next level. The key is to keep add-ins small so they don’t overpower the smooth texture of the ice cream.
These mix-ins make each scoop of Neapolitan ice cream unique and fun, turning a classic dessert into something that feels personalized and special every time you serve it.
Serving Ideas and FAQs


A whimsical chef illustration with question marks in the background, symbolizing common questions and creative serving ideas for Neapolitan ice cream.
Best Occasions to Serve Neapolitan Ice Cream (Parties, Summer Gatherings)
One of the reasons Neapolitan ice cream has remained so popular is its incredible versatility—it’s a dessert that feels right at home in nearly any setting. With its trio of chocolate, vanilla, and strawberry, it’s a guaranteed crowd-pleaser, making it a smart choice for events where tastes vary.
-
Birthday Parties: Few desserts bring as much nostalgia as Neapolitan ice cream. Its colorful layers look beautiful on a plate beside cake, and it ensures that kids and adults alike get a flavor they love. Pair it with a simple vanilla or chocolate cake for a classic party combo.
-
Summer Gatherings: Whether it’s a backyard BBQ, a poolside get-together, or a picnic in the park, Neapolitan ice cream delivers refreshing relief on hot days. Its fruity strawberry layer gives it a light, summery feel, while the chocolate and vanilla keep it comforting.
-
Family Dinners: Serving Neapolitan after a hearty meal is an easy way to end on a sweet note without overcomplicating dessert. A simple scoop in a bowl or cone is often all it takes to make dinner feel special.
-
Festive Celebrations: From holidays to anniversaries, Neapolitan can be dressed up as an ice cream cake, loaf, or parfait. Its elegant stripes make it visually striking, and with creative garnishes—like sprinkles, whipped cream, or fresh fruit—it fits right into any festive table.
Because it naturally offers three flavors in one, Neapolitan ice cream eliminates the need to choose, making it a safe and satisfying dessert for groups. Wherever there’s laughter, celebration, and warm weather, Neapolitan is always a welcome addition.
Pairing Ideas (Brownies, Waffles, Ice Cream Cones)
Neapolitan ice cream is already delicious on its own, but pairing it with other desserts takes it to the next level. Because it has three flavors in one, it complements a wide range of sweets, making it one of the most versatile frozen treats.
-
Brownies: The rich, fudgy texture of brownies pairs beautifully with Neapolitan ice cream. A warm brownie topped with a scoop of all three flavors creates the ultimate hot-and-cold dessert contrast. The chocolate layer melts into the brownie, the vanilla adds creaminess, and the strawberry gives a refreshing fruitiness.
-
Waffles: Crispy waffles make a fantastic base for Neapolitan scoops. You can serve it as a fun breakfast-for-dessert idea or as a casual yet indulgent snack. Add whipped cream, chocolate syrup, or fresh strawberries for extra flair.
-
Ice Cream Cones: One of the simplest but most nostalgic ways to enjoy Neapolitan is in a cone. Because of the distinct stripes of chocolate, vanilla, and strawberry, it looks extra colorful when scooped into a waffle or sugar cone. Kids especially love this option.
-
Other Pairings:
-
Sandwich scoops between cookies for a playful ice cream sandwich.
-
Serve alongside fruit pies like apple or cherry to balance tart and sweet.
-
Use it in milkshakes for a fun twist that blends all three flavors together.
-
These pairing ideas show that Neapolitan isn’t just a standalone treat—it’s also the perfect partner for classic desserts that need a cool, creamy sidekick.
Storage and Freezing Tips for Leftovers
Making homemade Neapolitan ice cream often results in a big batch, so proper storage is essential to keep it creamy, flavorful, and free from freezer burn. With the right techniques, you can enjoy your leftovers for weeks without sacrificing quality.
-
Use an Airtight Container: Transfer any leftover ice cream into a freezer-safe, airtight container. Shallow, wide containers are best for even freezing and easier scooping. Avoid leaving it in the loaf pan uncovered, as it can quickly develop ice crystals.
-
Cover the Surface: Before sealing the lid, press a piece of plastic wrap, parchment paper, or wax paper directly against the surface of the ice cream. This barrier reduces air exposure and prevents freezer burn.
-
Store at the Back of the Freezer: Place the container in the coldest part of your freezer (usually the back) rather than the door, where temperatures fluctuate more often. Consistent freezing keeps the texture smooth.
-
Label and Date: If you make ice cream often, label your container with the flavor and date. Homemade Neapolitan is best enjoyed within 2–3 weeks for peak flavor and texture.
-
Soften Before Scooping: When ready to serve leftovers, let the container sit at room temperature for 5–10 minutes before scooping. This softens the ice cream just enough for easy serving without melting the entire batch.
-
Avoid Refreezing Melted Ice Cream: If your ice cream melts significantly, don’t refreeze it, as the texture will become icy and grainy. Instead, enjoy it as a milkshake or smoothie base.
With these storage tips, your leftover Neapolitan ice cream will stay as creamy and delicious as the day you made it—ready to scoop for your next sweet craving.
FAQs (Can I Use Frozen Strawberries? How Long Does It Last?)
Homemade Neapolitan ice cream is a crowd favorite, and many home cooks have common questions about ingredients and storage. Here are two of the most frequent concerns:
1. Can I Use Frozen Strawberries?
Yes! Frozen strawberries are a great alternative if fresh ones aren’t in season. Since they’re typically picked at peak ripeness and flash-frozen, they retain their flavor and sweetness. Before using, thaw and drain them to prevent excess water from making your strawberry ice cream icy. For the smoothest texture, blend thawed strawberries into a puree, and if needed, strain out the seeds.
2. How Long Does It Last?
When stored properly in an airtight, freezer-safe container with a protective layer of plastic wrap or parchment paper pressed against the surface, homemade Neapolitan ice cream will stay fresh for 2–3 weeks. Beyond that, it’s still safe to eat but may develop freezer burn or lose some of its creamy texture. For the best experience, enjoy it within the first couple of weeks when the flavors are at their peak.
These simple tips ensure your homemade Neapolitan ice cream tastes just as delicious on day 14 as it did on day one—whether you’re scooping for a weekday dessert or serving it at your next summer gathering.
Looking for another family-friendly dish? Try our Easy Meatloaf Recipe, a timeless dinner favorite.”