How To Make The Best Chili Seasoning Recipe For Any Chili Lover
What Makes a Great Chili Seasoning Recipe?
Why Homemade Chili Seasoning is the Best Option
Making your own chili seasoning mix at home offers several advantages over purchasing pre-made mixes from the store. Not only does it allow you to customize the flavor, but it also gives you full control over the ingredients. Here’s why homemade chili seasoning is the best choice:
1. Full Control Over Ingredients
One of the biggest benefits of making your own chili seasoning is that you have complete control over the ingredients you include. Many store-bought chili seasonings contain preservatives, artificial flavor enhancers, and sometimes even MSG (monosodium glutamate), which you might prefer to avoid. By making your own seasoning, you can choose the highest quality spices and herbs, ensuring they are fresh and free from unnecessary chemicals or additives.
You can also tailor the seasoning to suit your health preferences or dietary needs. For example:
Low-sodium: If you’re watching your salt intake, you can easily omit or reduce the amount of salt in your homemade seasoning.
Organic: You can use all organic spices and herbs for a cleaner, more natural flavor profile.
Allergen-Free: For those with specific allergies, like gluten or soy, making your own seasoning ensures you’re not unknowingly adding ingredients that could cause a reaction.
2. No Artificial Additives or Preservatives
Store-bought seasoning mixes often contain artificial additives and preservatives to extend their shelf life. These can include things like anti-caking agents (to keep the spices from clumping) or synthetic flavor enhancers that might not be desirable for a clean, whole-food diet. When you make your own chili seasoning, you avoid these additives entirely.
By using just whole, fresh spices, you’re creating a seasoning mix that is not only more natural but also healthier. The absence of artificial chemicals means you’re getting the purest flavor from the spices themselves—nothing more, nothing less.
3. Customizable to Your Taste Preferences
Another compelling reason to make your own chili seasoning is that it’s completely customizable. When you make the mix yourself, you can adjust the spices to fit your unique flavor preferences and tolerance for heat. You’re in charge of the ingredients, so if you love a smoky, earthy flavor, you can add more paprika and cumin. If you prefer a spicier kick, you can increase the cayenne pepper or red pepper flakes.
This flexibility allows you to create a seasoning mix that perfectly complements your personal tastes. For example:
Spice Level: If you love heat, you can amp up the cayenne or chipotle powder, or add more chili flakes.
Flavor Profile: If you prefer a sweet chili, you can add brown sugar, cinnamon, or cocoa powder to your mix for extra depth and complexity.
Texture: You can even control the grind of the spices (e.g., using coarsely ground black pepper or fine ground for a smoother finish) to suit your desired texture in your chili dish.
4. Cost-Effective
Homemade chili seasoning is often more affordable than buying pre-packaged mixes, especially since the ingredients are shelf-stable and can be used in multiple recipes. Buying spices in bulk or in larger containers can be a cost-effective option, as you’ll have plenty left over for future uses. In the long run, this is not only cheaper but more economical, as you’re only buying what you need for the seasoning.
Furthermore, pre-made chili seasoning mixes tend to come in small packages that might not contain enough for multiple uses. By making your own, you get more bang for your buck with a larger batch of seasoning.
5. Better Flavor Freshness
Freshly ground spices have a more vibrant, potent flavor than pre-ground, pre-packaged spices that may have lost some of their essential oils over time. When you make your own chili seasoning, you’re using spices at their peak freshness, giving your chili a much richer, more robust flavor. You can even toast some of the spices briefly to release more of their oils and intensify their flavor before mixing them into your blend.
6. The Satisfaction of Homemade
There’s something special about creating your own seasoning mix from scratch. Not only do you get to enjoy a seasoning that’s perfectly suited to your needs, but you also get the satisfaction of knowing exactly what’s in it. The process is simple, and the reward is a flavorful, customizable spice blend that makes your chili (and other dishes) stand out.
Making your own seasoning also opens up opportunities for creativity. You can experiment with different spices or herbs, such as adding a touch of smoked paprika for an extra smoky punch, or trying a mix of chili varieties for a deeper, layered heat. Every batch of seasoning becomes uniquely yours, something store-bought mixes can’t replicate.
Key Components of a Balanced Chili Seasoning
A well-balanced chili seasoning is a carefully crafted mix of spices that come together to create the perfect flavor profile for your chili. Each spice serves a unique role, enhancing and complementing the others. The key components of a great chili seasoning are essential spices like chili powder, cumin, garlic powder, and paprika. Here’s a closer look at each of these spices and their contribution to the overall flavor:
1. Chili Powder: The Base of the Blend
Flavor Profile: Chili powder is typically the star ingredient in most chili seasoning mixes. It’s a blend of dried chili peppers, salt, and sometimes additional spices like garlic powder, cumin, or oregano. The flavor of chili powder is often mild to medium spicy with earthy, slightly smoky notes.
Role in Chili Seasoning: Chili powder provides the foundation of the flavor in your seasoning mix. It’s the primary ingredient responsible for the characteristic heat and depth of flavor in chili. Without it, your chili wouldn’t have that familiar, spicy warmth that makes it so comforting. It’s the backbone of the seasoning mix, giving the chili its distinctive color and flavor.
Tip: If you prefer a more intense heat, you can opt for a hotter variety of chili powder (such as ancho chili powder, which is mild, or chipotle chili powder, which is smokier and spicier).
2. Cumin: The Earthy, Warm Spice
Flavor Profile: Cumin is one of the most essential spices in chili seasoning, known for its warm, earthy, and slightly nutty flavor. It has a savory taste that’s both aromatic and slightly peppery. Cumin is used widely in various global cuisines, especially in Latin American, Indian, and Middle Eastern dishes.
Role in Chili Seasoning: Cumin’s earthy, savory taste balances out the heat from the chili powder. It adds depth to the chili’s flavor, making it richer and more complex. Without cumin, your chili seasoning might taste flat or one-dimensional. It also helps to enhance the other spices in the mix, allowing them to shine.
Tip: Toasting cumin seeds in a dry skillet before adding them to your chili seasoning can bring out their full, smoky flavor and add an extra layer of richness.
3. Garlic Powder: The Savory, Aromatic Kick
Flavor Profile: Garlic powder adds a savory, pungent, and slightly sweet flavor to the seasoning mix. It’s less sharp than fresh garlic, but it still delivers a warm, aromatic depth to the chili. Garlic powder has a more subdued flavor compared to fresh garlic, but it’s a key ingredient in balancing the heat and smokiness in your seasoning blend.
Role in Chili Seasoning: Garlic powder enhances the overall savory quality of the chili seasoning. It complements the cumin and chili powder, while also adding a roundness to the flavor profile. Garlic is known for its ability to amplify and elevate other flavors, making it a crucial ingredient in creating a well-rounded chili seasoning.
Tip: If you don’t have garlic powder, you can use onion powder or fresh minced garlic, but garlic powder is often preferred in chili seasoning because of its ability to mix evenly with the other dry spices.
4. Paprika: The Smoky, Sweet Element
Flavor Profile: Paprika is made from dried and ground sweet peppers, and it can range from sweet to hot. The most common variety used in chili seasoning is sweet paprika, which adds a mild, sweet pepper flavor with hints of smokiness. Smoked paprika (or pimentón) is a great option for adding a deeper, smoky flavor, while regular paprika brings a subtle sweetness.
Role in Chili Seasoning: Paprika plays a vital role in balancing the heat of the chili seasoning mix. It offers a sweetness that helps to round out the spice of the chili powder and cumin. Additionally, paprika contributes to the color of the dish, giving chili that rich red hue. Smoked paprika, in particular, introduces a deeper smokiness that can make your chili more complex and satisfying.
Tip: If you like a deeper smoky flavor, swap out regular paprika for smoked paprika. It’ll give your chili a robust, barbecue-like quality without overwhelming the other flavors.
Additional Spices to Enhance Your Chili Seasoning:
While chili powder, cumin, garlic powder, and paprika form the core of a balanced chili seasoning, there are other spices and herbs you can add to enhance the flavor profile. Here are a few options to consider:
Oregano: Adds a touch of herbaceous bitterness, which balances the richness of the chili powder and cumin.
Onion Powder: Brings a savory, umami flavor that complements garlic powder.
Cayenne Pepper: If you prefer your chili with more heat, cayenne pepper is a great way to add a fiery kick.
Cinnamon: A pinch of cinnamon can add a surprising layer of warmth and sweetness that pairs well with tomatoes in chili.
Brown Sugar: A small amount of brown sugar can help balance out the acidity and spice, creating a more rounded flavor.
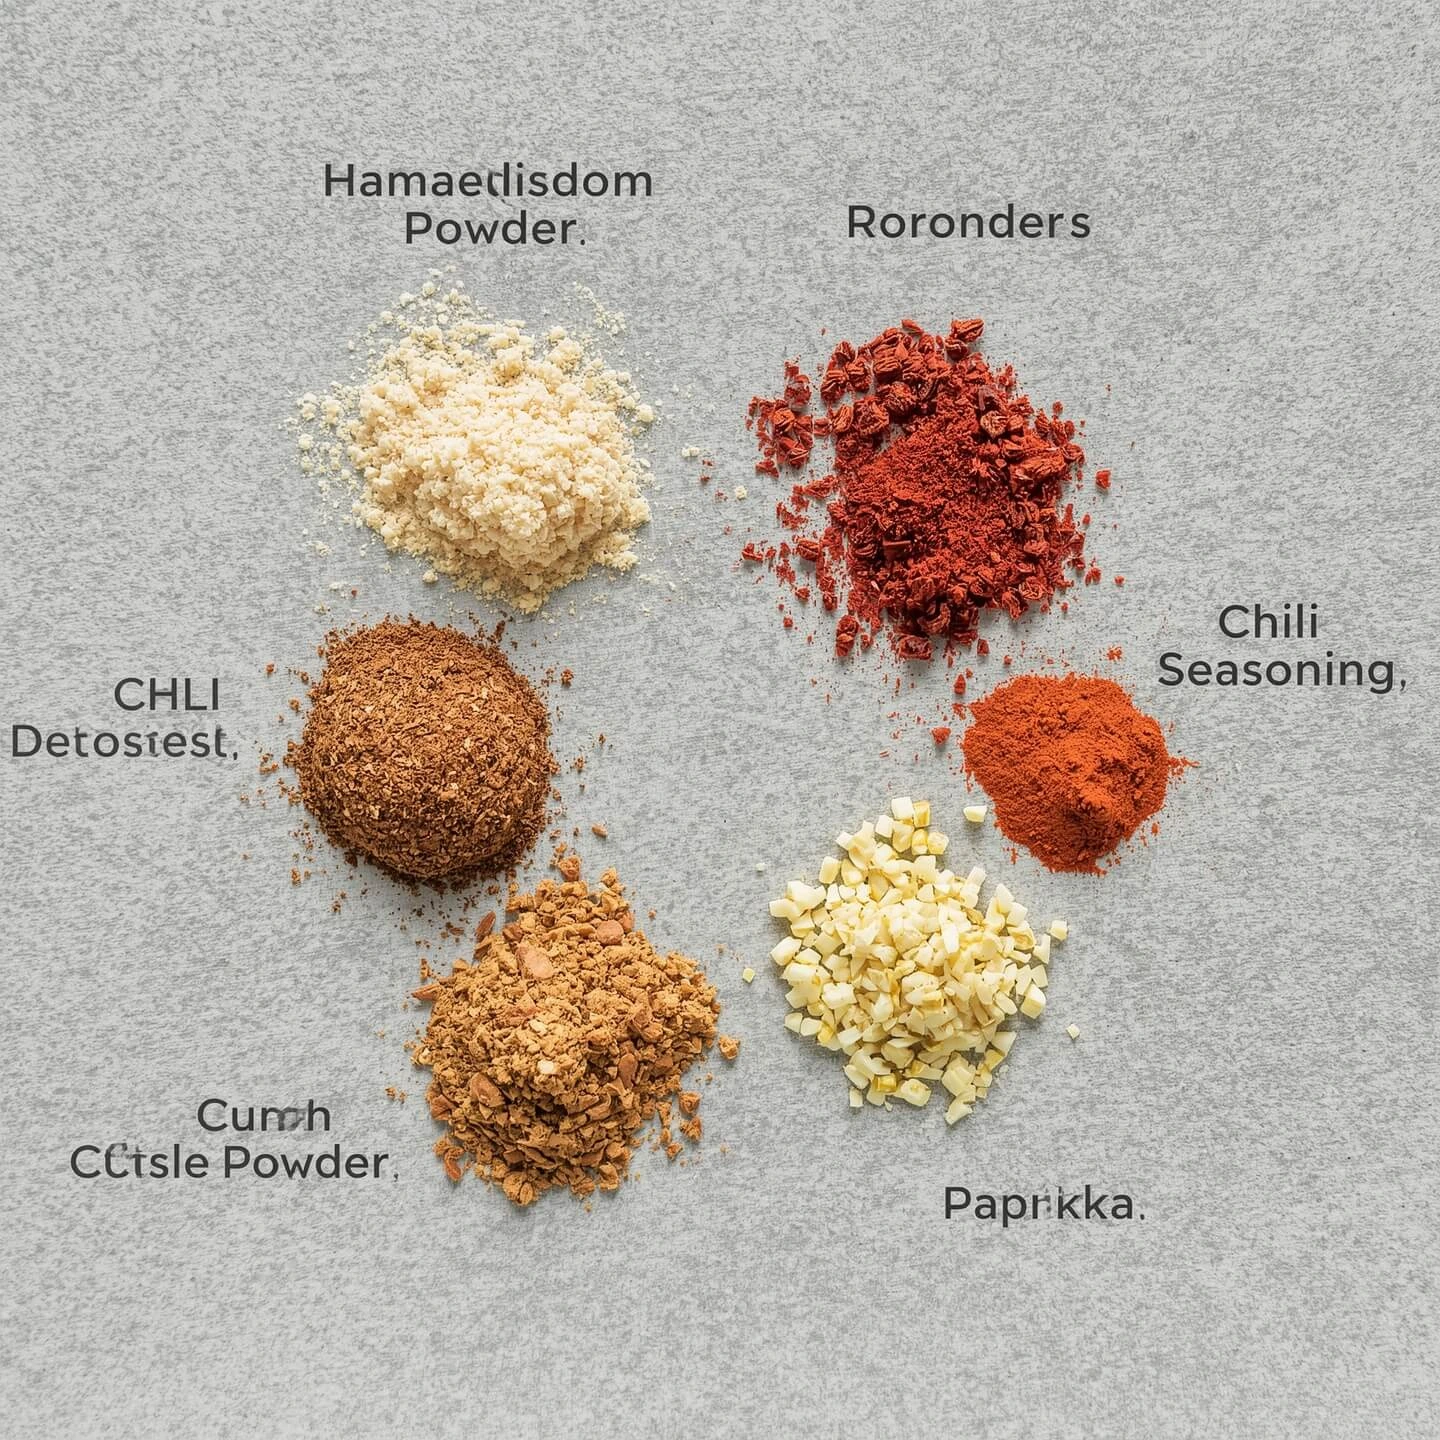
Ingredients for Homemade Chili Seasoning
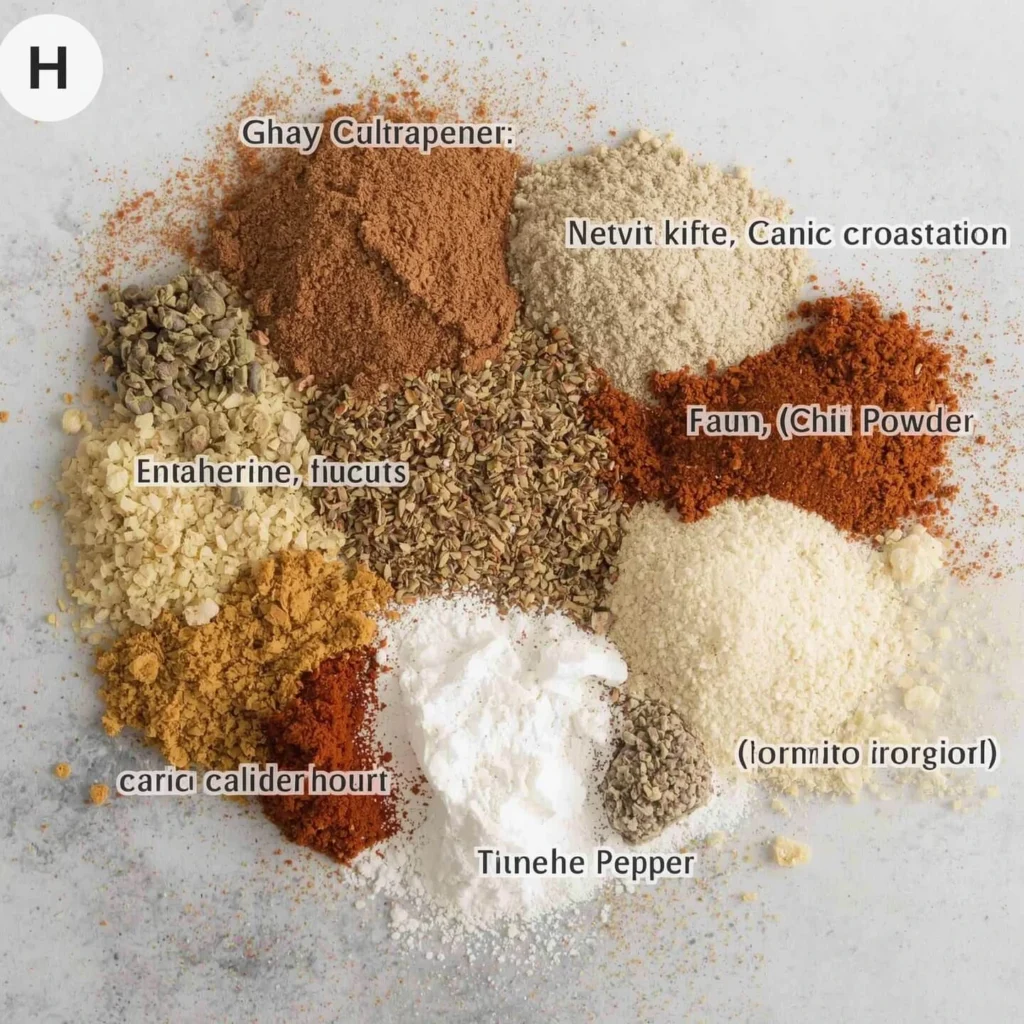
A variety of spices used for making chili seasoning, including chili powder, turmeric, pepper, and garlic, spread out on a light gray surface.
H3: The Essential Spices for Chili Seasoning
Creating the perfect chili seasoning relies on a well-chosen blend of spices that combine to provide heat, depth, and balance to the dish. While you can get creative and add additional spices to your chili mix, there are a few essential spices that are absolutely crucial for making a flavorful and aromatic chili seasoning. Here’s a breakdown of the key spices that form the foundation of a great chili seasoning:
1. Chili Powder: The Heart of Chili Seasoning
Flavor Profile: Chili powder is the primary spice that defines the chili seasoning mix. It’s a blend of dried ground chili peppers, which range from mild to hot, along with other spices such as cumin, garlic powder, and sometimes oregano. The flavor is typically mild to medium in heat, with a slightly earthy, fruity, and sometimes smoky taste, depending on the type of chili used.
Role in Chili Seasoning: Chili powder serves as the base of your chili seasoning. It provides the primary source of heat and gives the chili its signature spicy flavor. Without chili powder, the seasoning would lack the essential “chili” flavor. The amount you use will determine the heat level of your chili, so it’s important to find the right balance to suit your tastes.
Tip: If you prefer a hotter chili, opt for a chipotle chili powder or a cayenne-infused chili powder, which will add both heat and a smoky richness. On the other hand, a mild chili powder will keep your chili more balanced and not overpower the other spices.
2. Cumin: The Earthy Backbone
Flavor Profile: Cumin has a warm, earthy, and slightly nutty flavor. It’s not overly spicy but adds a savory, aromatic depth to your seasoning mix. Its distinctive flavor is one of the reasons chili seasoning feels so hearty and comforting. Cumin also brings out the natural sweetness of other spices, making it a vital component in many spice blends around the world, particularly in Latin and Indian cuisines.
Role in Chili Seasoning: Cumin plays a crucial role in giving chili seasoning its warmth and complexity. It balances the heat from chili powder and cayenne pepper and enhances the savory notes in the dish. Without cumin, your chili would feel flat, missing the richness and depth that comes with this spice. It also pairs wonderfully with tomatoes, which are often a key ingredient in chili.
Tip: Toasting whole cumin seeds in a dry pan for a few minutes before grinding them into a powder can release even more aromatic oils and intensify its flavor, making your chili seasoning even more fragrant.
3. Paprika: Sweet and Smoky Flavor
Flavor Profile: Paprika is a bright red spice made from dried and ground sweet peppers. It has a range of flavors depending on the variety you use. Sweet paprika is mild and adds a subtle sweetness, while smoked paprika (also known as pimentón) has a rich, smoky flavor that gives chili a more complex, savory note. Some types of paprika can also have a slight bitterness, which balances out the heat in the chili seasoning.
Role in Chili Seasoning: Paprika’s primary job in chili seasoning is to add sweetness and color. It softens the sharpness of the chili powder and adds a deep, warm hue to the chili. If you’re using smoked paprika, it also adds that irresistible smoky flavor that complements the earthiness of cumin and the heat from chili powder. This balance of flavors creates a harmonious, multi-layered seasoning mix.
Tip: Experiment with smoked paprika if you want to add a touch of BBQ flavor to your chili. It’s a great way to enhance the depth of the dish, especially if you’re using meats like beef or turkey in your chili.
4. Garlic Powder: The Savory Umami Kick
Flavor Profile: Garlic powder is made by grinding dehydrated garlic cloves into a fine powder. It has a mellow, savory flavor that’s less pungent than fresh garlic but still delivers that unmistakable garlicky kick. Its flavor is slightly sweet and warm with a deep umami richness.
Role in Chili Seasoning: Garlic powder enhances the overall savory complexity of the chili seasoning. While it doesn’t add heat or spice, it adds a depth of flavor that balances out the other spices and makes the seasoning more rounded and full-bodied. Garlic is a crucial aromatic that helps meld all the ingredients together, creating a well-rounded flavor profile for the chili.
Tip: If you don’t have garlic powder, you can use fresh minced garlic, but garlic powder is preferred for dry seasoning mixes because it blends evenly and doesn’t clump. Be sure to use garlic powder in moderation, as it can easily overwhelm the other flavors.
5. Cayenne Pepper: The Heat Element
Flavor Profile: Cayenne pepper is a ground red chili pepper that brings a significant level of heat to the mix. It has a sharp, fiery kick that can range from moderately spicy to very hot, depending on how much you use. While cayenne itself doesn’t have much in the way of flavor beyond its heat, it works wonders in intensifying the spiciness of the chili.
Role in Chili Seasoning: Cayenne pepper is often used as the heat component in chili seasoning. If you like your chili spicy, cayenne is your go-to spice. It provides an instant heat that lingers, making every bite of chili more exciting. Cayenne should be used sparingly, however, as it can easily overpower the other flavors if added in excess.
Tip: Start with a small amount of cayenne pepper (about 1/4 teaspoon for a mild chili) and increase it based on your preferred spice level. If you don’t want your chili too hot but still want a bit of a kick, substitute cayenne with paprika or chipotle powder for a milder, smoky heat.
Additional Optional Spices to Enhance Your Chili Seasoning
While these five spices form the backbone of your chili seasoning, there are several other optional spices that can elevate the mix:
Onion Powder: Adds an extra layer of savory, sweet flavor to balance the garlic powder.
Oregano: Brings a touch of herbal bitterness that complements the heat of chili and cayenne.
Cinnamon: A pinch of cinnamon can add a surprising warmth and richness to your chili, especially if you’re adding sweet ingredients like tomatoes or beans.
Brown Sugar: A small amount of brown sugar helps to balance out the heat and acidity, giving the chili a well-rounded sweetness.
Optional Additions for Extra Flavor
While the core spices like chili powder, cumin, garlic powder, paprika, and cayenne are essential for creating a well-balanced chili seasoning, sometimes it’s the optional ingredients that can take your chili to the next level. These additions can introduce layers of complexity, subtle sweetness, or even an unexpected depth of flavor, allowing you to customize your chili seasoning and make it truly unique. Here are some popular optional ingredients to consider adding to your homemade chili seasoning:
1. Brown Sugar: A Touch of Sweetness
Flavor Profile: Brown sugar has a rich, warm sweetness, with a hint of molasses that adds depth. It’s not as sharp as white sugar, but its earthy undertones balance out the heat from chili powder and cayenne pepper.
Role in Chili Seasoning: Adding brown sugar to your chili seasoning mix helps to balance the spice and acidity, especially if you’re using ingredients like tomatoes or vinegar. The sweetness can tone down the intensity of the heat, creating a well-rounded flavor profile that’s both savory and slightly sweet. It also complements beans and meats, which can sometimes have a naturally bitter flavor when combined with chili spices.
Tip: Be careful with the amount of brown sugar—start with a teaspoon and adjust to taste. You want just enough to subtly sweeten the mix without making your chili taste like a dessert.
2. Cocoa Powder: Deep and Rich Flavor
Flavor Profile: Unsweetened cocoa powder adds a deep, bittersweet flavor to chili, contributing a rich, chocolatey undertone without the sweetness. It brings a complexity and warmth to the dish, similar to the depth of flavor you’d find in a mole sauce.
Role in Chili Seasoning: Cocoa powder can enhance the savory richness of your chili, balancing the heat and making the dish feel more decadent. It pairs beautifully with spices like cumin and chili powder, adding a subtle depth that makes your chili taste fuller and more robust. Cocoa also helps to emphasize the earthy flavors in the chili, especially when paired with beans or meats like beef or turkey.
Tip: Use cocoa powder sparingly—start with one teaspoon and taste. You don’t want it to overpower the other spices, but rather to add a rich, velvety undertone to the chili’s flavor.
3. Oregano: Herbal Brightness
Flavor Profile: Oregano is a savory, herbaceous spice with earthy, slightly bitter undertones. It’s commonly used in Mediterranean and Mexican cuisines and adds a fragrant, bright herbal note to chili. It can range from mild to slightly pungent, depending on the variety.
Role in Chili Seasoning: Oregano complements the earthy flavors of cumin and chili powder while balancing the overall flavor with its slightly bitter and herbaceous qualities. It’s especially useful in beef and pork chilies or any chili with a strong tomato base, where the herbaceous flavor helps to cut through the richness and add a fresh, bright contrast.
Tip: Use Mexican oregano if you want a flavor that’s closer to traditional chili seasonings, as it has a slightly citrusy flavor compared to Mediterranean oregano. Add 1 teaspoon to start, and adjust depending on your preference for herbal notes.
4. Cinnamon: Warmth and Complexity
Flavor Profile: Cinnamon is a sweet and slightly spicy spice that adds a warming, comforting flavor with subtle hints of clove and nutmeg. While often used in baked goods, it’s an excellent addition to savory dishes like chili, where it can lend an unexpected warmth and sweetness.
Role in Chili Seasoning: Cinnamon can introduce a subtle warmth and aromatic complexity to your chili seasoning mix. It adds depth without being overpowering and helps to balance the heat of the chili powder and cayenne. Cinnamon works especially well in chili recipes that include beans, tomatoes, or even sweet potatoes, as it enhances the natural sweetness of these ingredients. It’s particularly effective when paired with other ingredients like cocoa powder, giving your chili a rich, layered flavor.
Tip: Start with just 1/4 teaspoon of cinnamon. You can always add a little more, but a little goes a long way. It should blend harmoniously into the background, not stand out as the dominant flavor.
5. Smoked Paprika: Adding Smokiness
Flavor Profile: Smoked paprika is made from dried peppers that are smoked over oak or another type of wood. It has a deep, smoky flavor with a mild heat and a slightly sweet edge. This variety of paprika is perfect for adding a rich, smoky note to your chili without overwhelming the other spices.
Role in Chili Seasoning: Smoked paprika introduces smoky complexity to your chili, complementing both the earthiness of cumin and the heat of chili powder. It’s particularly effective in chili recipes that feature meats, as the smoky flavor pairs well with grilled or slow-cooked beef, pork, or turkey. If you’re looking for a deeper, more robust flavor in your chili, smoked paprika is an excellent addition.
Tip: If you’re using smoked paprika, reduce or eliminate any other smoked ingredients you might be considering (like liquid smoke) to prevent the chili from becoming too smoky. A teaspoon is usually enough to add a nice smoky background flavor.
6. Chipotle Powder: A Smoky, Spicy Kick
Flavor Profile: Chipotle powder is made from dried and ground smoked jalapeño peppers. It’s smoky, earthy, and has a medium to hot level of heat. This spice provides both smokiness and spice, giving chili a distinctive flavor.
Role in Chili Seasoning: Chipotle powder not only adds heat but also infuses your chili with a smoky, spicy kick that enhances the overall depth of flavor. It works particularly well in chili recipes that include meats or beans, providing a bold contrast to the other spices. The smoky heat from chipotle powder can also help to deepen the flavor if you’re making a large pot of chili that needs a little extra oomph.
Tip: Use chipotle powder sparingly as it can be quite potent. Start with 1/4 teaspoon and gradually adjust depending on how spicy and smoky you want your chili.
How to Make the Best Chili Seasoning Blend
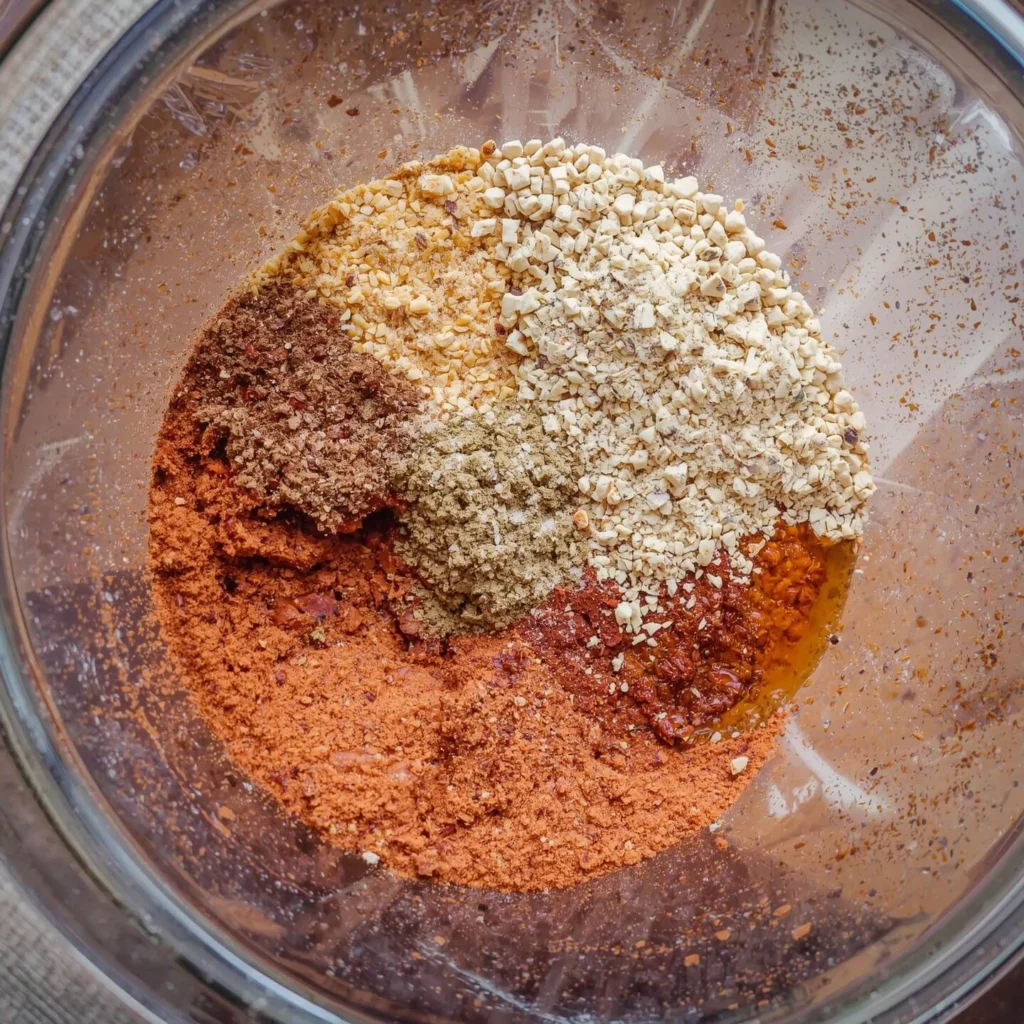
“A variety of spices, including chili flakes, paprika, garlic powder, and cumin, are mixed together in a glass bowl to create a homemade chili seasoning.”
Step-by-Step Guide to Mixing Your Chili Seasoning
Creating your own chili seasoning mix is incredibly simple, and it’s a great way to ensure your chili has fresh, bold flavors every time you cook. With just a few basic spices and a few minutes of effort, you can have a homemade seasoning mix ready to go for your next chili recipe. Below is a detailed, step-by-step guide to mixing your chili seasoning at home.
Step 1: Gather Your Ingredients
To make a well-rounded chili seasoning mix, you’ll need the following essential spices:
2 tablespoons chili powder (the base of your seasoning)
1 tablespoon ground cumin (adds earthy warmth)
1 tablespoon paprika (adds sweetness and color, use smoked paprika for a smoky twist)
1 teaspoon garlic powder (adds savory depth)
1 teaspoon onion powder (optional, for extra savory flavor)
1/2 teaspoon cayenne pepper (for heat—adjust to taste depending on how spicy you want your chili)
1/2 teaspoon oregano (optional, for an herbal undertone)
These quantities will make enough seasoning for a large pot of chili (about 6-8 servings). You can adjust the quantities to suit your taste or scale the recipe up if you want to make a larger batch.
Step 2: Combine the Spices in a Mixing Bowl
Now that you have your ingredients, it’s time to combine them.
Step 2.1: Take a medium-sized mixing bowl and add all of your dry spices: chili powder, cumin, paprika, garlic powder, onion powder, cayenne pepper, and oregano (if using).
Step 2.2: Use a spoon or small whisk to stir the spices together. Make sure they are well-mixed and evenly distributed. This ensures that each spoonful of your chili seasoning mix will have a consistent flavor, with no overpowering spice or uneven seasoning.
Tip: If you want your seasoning to be extra fine, you can use a fine mesh sieve or sifter to sift the spices through, removing any clumps and making the blend smoother.
Step 3: Adjust the Flavor to Your Preference
This is the fun part! Taste the mix and see how you like the balance of flavors.
For more heat: Add more cayenne pepper or even a pinch of chipotle powder for a smoky heat.
For a more smoky flavor: Consider adding extra smoked paprika or a tiny bit of liquid smoke (just a few drops), but be careful not to overpower the mix.
For a touch of sweetness: Add 1 teaspoon of brown sugar or cocoa powder to balance the heat.
For extra savory depth: Add 1/2 teaspoon of dried oregano or 1/2 teaspoon of onion powder if you didn’t include it earlier.
Mix and taste again until the seasoning suits your preferences.
Step 4: Store Your Chili Seasoning
Once you’ve mixed and adjusted your seasoning to perfection, it’s time to store it properly.
Step 4.1: Transfer your chili seasoning mix into an airtight container, such as a small mason jar, a spice jar, or a resealable plastic bag.
Step 4.2: Label the container with the name of the mix and the date it was made. Homemade chili seasoning can last for up to 6 months if stored in a cool, dry place, away from direct sunlight or heat.
Tip: If you make a large batch, consider keeping your seasoning mix in a spice jar or spice shaker for easy access while cooking.
Step 5: Use Your Homemade Chili Seasoning
Now that you have your homemade chili seasoning ready, it’s time to use it!
For Chili: Add about 2 to 3 tablespoons of your chili seasoning mix for every pound of meat or beans you’re cooking (adjust based on your taste preferences and the size of your pot).
For Tacos or Other Dishes: You can use your chili seasoning for tacos, soups, stews, roasted vegetables, or even as a seasoning for meats like chicken or beef. A pinch of chili seasoning can easily elevate any dish.
Bonus Tips for Mixing Chili Seasoning:
Batch Adjustments: If you’re making a larger batch for long-term storage, you can increase the quantities of each spice. Just be sure to keep the ratios the same.
Blend Variations: Feel free to experiment with other spices such as cinnamon, allspice, or turmeric for unique flavor profiles. Cocoa powder and coffee can also add depth, especially in beef chili.
Check Consistency: If you find the mix too spicy, add more paprika or cumin to mellow it out. If it’s not spicy enough, a bit more cayenne or chipotle can turn up the heat.
How to Adjust the Spice Level to Your Taste
When it comes to chili, the perfect balance of heat and sweetness is key to creating a flavorful, well-rounded dish. Everyone has different spice tolerance levels, so adjusting the heat and sweetness of your homemade chili seasoning is crucial to tailoring it to your specific taste. In this section, we’ll cover how to fine-tune both the heat and sweetness in your seasoning mix, using ingredients like cayenne pepper, red pepper flakes, brown sugar, and honey.
Adjusting the Heat: Spicy, Mild, or Anywhere In Between
The spice level in your chili can be customized depending on how much heat you want to bring to the dish. Heat can be adjusted in two primary ways: by adding more spicy ingredients or by diluting the heat if it becomes too intense. Here are some tips for adjusting the heat of your chili seasoning:
1. Increase the Heat with Cayenne Pepper or Red Pepper Flakes
Cayenne Pepper: Cayenne pepper is one of the most effective ingredients for adjusting the heat in your chili seasoning. It adds a sharp, fiery kick that builds as you eat. Cayenne is a potent spice, so even a little goes a long way.
How to Adjust: Start with 1/4 teaspoon of cayenne pepper for a mild heat. If you want it spicier, gradually add more in small increments, tasting as you go. For a hotter chili, you can even double the amount of cayenne pepper.
Tip: Cayenne can also be paired with other spicy ingredients like chipotle powder for a smokier heat or paprika for a more subtle warmth. If you want a fiery, bold chili, combine cayenne with jalapeño powder or chipotle chili powder.
2. Use Red Pepper Flakes for a More Balanced Heat
Red Pepper Flakes: Red pepper flakes bring heat but also a bit of texture and crunch, which can add another layer of complexity to your chili seasoning. The heat from red pepper flakes tends to be slightly milder than cayenne pepper but still provides a good kick.
How to Adjust: Start with 1/2 teaspoon of red pepper flakes for a moderate heat. You can add more if you prefer it spicier, or decrease it if you want a gentler level of heat. Red pepper flakes will also provide small, noticeable bursts of spice, which can add a fun textural element to your chili.
3. Reduce the Heat for a Milder Chili
Reduce Spicy Ingredients: If your chili seasoning is too hot, the easiest way to reduce the heat is by cutting back on the cayenne or red pepper flakes. You can also omit or reduce other hot ingredients, like chili powder (especially hot varieties), chipotle powder, or crushed red pepper flakes.
Balance the Heat: You can counterbalance too much heat by adding more paprika, onion powder, or garlic powder. These ingredients won’t add heat but will help smooth out the fiery intensity of the chili. If the heat is still overwhelming, adding extra tomato paste or beans (if you use them) can help dilute the spice.
Adjusting the Sweetness: Balancing the Spice with Sugar and Sweeteners
Sweetness can be a great way to balance the heat in your chili, especially if it’s on the spicier side. Sweeteners like brown sugar or honey help to cut through the acidity and heat, giving your chili a smoother, more rounded flavor. Here’s how to adjust the sweetness:
1. Add Brown Sugar for a Subtle Sweetness
Brown Sugar: Brown sugar is a natural sweetener that brings a warm, molasses-like sweetness to your chili seasoning. It complements the savory and spicy elements without overpowering them. The sugar’s slight caramel flavor can also add complexity to the dish, enhancing the overall depth.
How to Adjust: Start with 1 teaspoon of brown sugar for a mild touch of sweetness. You can gradually add more, up to 1 tablespoon, depending on how sweet you like your chili. Adding brown sugar not only balances the heat but also helps cut through the acidity from tomatoes and other tangy ingredients.
Tip: If you’re looking for a richer, slightly smoky flavor, use dark brown sugar instead of light brown sugar. The darker variety has more molasses content and adds a more complex sweetness to the mix.
2. Use Honey for a Natural Sweetness
Honey: Honey is a natural sweetener that adds a mild sweetness with floral undertones, which can beautifully complement the spice in chili. It’s particularly useful for adding a little sweetness without making the chili too syrupy or sugary.
How to Adjust: Use 1 teaspoon of honey to start, then taste and adjust from there. Honey is sweeter than brown sugar, so you may need less to achieve the same level of sweetness. You can add more honey if you want a more pronounced sweetness, but be careful not to make the chili taste overly sweet.
Tip: For a touch of depth, consider using raw honey or local honey—these varieties tend to have a more complex, layered flavor than regular store-bought honey.
3. Use Other Sweeteners for a Low-Sugar Option
Maple Syrup: If you’re looking for a natural sweetener with a unique flavor, you can use maple syrup instead of brown sugar or honey. It has a distinct woodsy sweetness that pairs well with the earthiness of cumin and chili powder. Start with 1 teaspoon and adjust to taste.
Stevia or Monk Fruit: For those who are watching their sugar intake, stevia or monk fruit sweetener can be used in place of sugar. These sugar substitutes are much sweeter than regular sugar, so use them sparingly (usually just a few drops or a pinch).
Tips for Balancing Heat and Sweetness in Your Chili
Taste as You Go: When adjusting the heat and sweetness, it’s crucial to taste your chili frequently. Start with small adjustments, and let the flavors meld together as they cook. Heat tends to build over time, so it’s always best to add a little at a time and let it simmer before making further adjustments.
Don’t Forget Other Flavor Enhancers: In addition to adjusting heat and sweetness, consider adding other flavor enhancers like tomato paste, vinegar, or a splash of lime juice to add tang and balance out the chili’s richness.
Add Sweetness Last: If you’re adding sugar or honey to balance out heat, do so after your chili has been cooking for a while. This way, the sweetness can meld with the other flavors and you won’t end up with a “too sweet” taste right from the start.
How to Use Chili Seasoning in Your Favorite Dishes
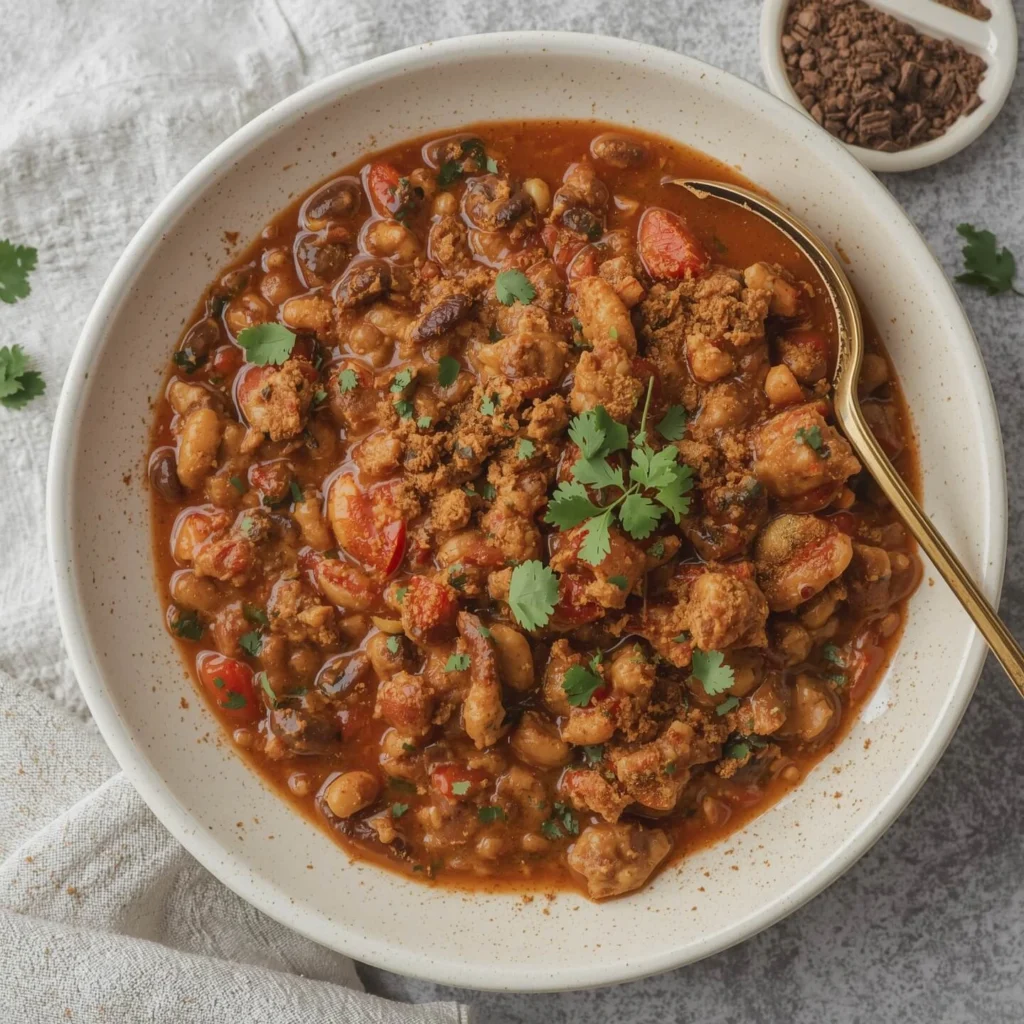
A bowl of homemade chili featuring a mix of beans, ground meat, fresh tomatoes, and topped with cilantro, served with a golden spoon.
Using Chili Seasoning in Chili Recipes
Once you’ve made your own chili seasoning, the next step is incorporating it into your favorite chili recipes. Whether you’re making beef chili, vegan chili, or other variations, the right chili seasoning can elevate your dish by adding deep, savory flavors, balanced heat, and just the right amount of spice. In this section, we’ll walk you through how to incorporate your homemade chili seasoning into different chili recipes, ensuring that your dish is perfectly seasoned every time.
1. Beef Chili: Classic and Hearty
Beef chili is one of the most popular and traditional chili recipes. The richness and depth of the beef pair beautifully with the bold flavors of your homemade chili seasoning. Here’s how to incorporate the seasoning:
How to Incorporate Chili Seasoning into Beef Chili:
Start by Browning the Meat: Begin by browning 1 to 2 pounds of ground beef (or beef chunks if you prefer a chunkier chili) in a large pot or Dutch oven. You can also use other cuts like stew meat for a more tender, hearty chili.
Add Onions and Garlic: After the meat is browned, add diced onions and minced garlic to the pot. Sauté until they become fragrant and the onions soften.
Add Chili Seasoning: Once the beef and onions are cooked, sprinkle in your homemade chili seasoning. A typical guideline is to use 2 to 3 tablespoons of chili seasoning for every pound of meat, but adjust based on your personal taste and spice tolerance. Stir well to coat the meat and onions with the seasoning. This allows the spices to bloom and infuse into the meat.
Add Tomatoes and Liquid: After adding the seasoning, pour in diced tomatoes (canned or fresh), tomato paste, and any additional liquids (like beef broth or water). This will help the flavors come together and simmer, creating a rich, flavorful base.
Simmer and Adjust: Let the chili simmer for at least 30 minutes to an hour, allowing the spices to meld. Taste and adjust the seasoning, adding more chili powder, salt, or even a pinch of sugar to balance the heat and acidity.
Optional Add-ins:
For extra richness, add a small can of black beans, kidney beans, or pinto beans. If you like a smokier chili, consider adding smoked paprika or a small amount of chipotle powder for depth.
If you like your chili with a bit of sweetness to balance the heat, stir in 1 tablespoon of brown sugar or a splash of honey toward the end of the cooking process.
2. Vegan Chili: A Hearty, Plant-Based Option
Vegan chili is just as delicious and satisfying as the traditional beef version. With the right blend of spices, you can create a rich, flavorful dish without any meat. Here’s how to incorporate your homemade chili seasoning into a vegan chili recipe:
How to Incorporate Chili Seasoning into Vegan Chili:
Sauté Vegetables: Start by sautéing a variety of diced vegetables, such as onions, bell peppers, carrots, and celery. This will create a hearty, flavorful base for your vegan chili.
Add Beans and Protein: For protein, you can use canned beans (black beans, kidney beans, or chickpeas) or textured vegetable protein (TVP) for a meat-like texture. Add these to the pot once the vegetables are softened.
Add Chili Seasoning: Sprinkle in your homemade chili seasoning (use about 2 tablespoons per can of beans). Stir well to coat the beans and vegetables with the seasoning. For added richness, you can also add a spoonful of tomato paste or canned diced tomatoes at this stage.
Add Liquid and Simmer: Pour in vegetable broth or water to create the desired chili consistency. Bring to a simmer and cook for 30 minutes to an hour, stirring occasionally to allow the spices to infuse the dish.
Taste and Adjust: Once the chili is simmered and the flavors have melded, taste and adjust the seasoning. You may want to add a bit more chili powder, a pinch of salt, or a dash of liquid smoke if you’re after that smoky flavor often associated with chili.
Optional Add-ins for Vegan Chili:
Corn: Stir in a cup of corn kernels for a bit of sweetness and texture.
Sweet Potatoes: Cubed sweet potatoes can be a great addition for sweetness and heartiness, and they absorb the chili seasoning wonderfully.
Vegan Sour Cream: Top your chili with a dollop of vegan sour cream or avocado to balance the spice and add a creamy texture.
3. Turkey or Chicken Chili: A Lighter Option
For a leaner, lighter alternative to beef chili, ground turkey or chicken can be used to create a delicious and satisfying dish. The seasoning mix will work just as well with poultry, giving the chili a flavorful, savory base with a slight reduction in fat.
How to Incorporate Chili Seasoning into Turkey or Chicken Chili:
Cook the Ground Turkey/Chicken: Brown 1 to 2 pounds of ground turkey or chicken in a large pot or Dutch oven, just as you would for beef chili. Add diced onions and minced garlic for extra flavor.
Add Chili Seasoning: Once the meat is cooked through, sprinkle in your homemade chili seasoning (again, about 2 tablespoons per pound of meat) and stir well to coat the turkey or chicken evenly. If you want a deeper flavor, you can also add tomato paste at this stage.
Add Tomatoes and Liquid: Pour in canned diced tomatoes, tomato sauce, or broth (chicken or vegetable broth works great here). Let the chili simmer for 30-45 minutes to allow the spices to meld and the flavors to intensify.
Taste and Adjust: As with other chili recipes, taste the chili and adjust the seasoning, adding more chili powder, salt, or heat if necessary. If the chili tastes too acidic, a small pinch of sugar can help balance it out.
Optional Add-ins for Turkey or Chicken Chili:
Beans: Use black beans, kidney beans, or pinto beans to add bulk and protein to the chili.
Vegetables: Zucchini, bell peppers, and spinach can be added for extra nutrition and texture.
4. Chili Variations: Customizing for Your Taste
Once you’re comfortable with using your chili seasoning, you can get creative and tailor your chili to suit various tastes or dietary preferences:
Spicy Chili: Increase the heat by adding more cayenne pepper or chipotle powder for a smoky, spicy kick. Fresh chili peppers (such as jalapeños or serranos) can also be added for an extra burst of heat.
Mild Chili: If you prefer a milder chili, reduce the amount of cayenne and chili powder and increase the paprika for a rich, smoky flavor without the intense heat.
Sweet Chili: Add a little brown sugar or honey for a sweet-and-spicy twist. Sweet potatoes or corn can also bring a pleasant sweetness to the chili, balancing the heat.
Smoky Chili: If you’re after a deep, smoky flavor, use smoked paprika or a small amount of liquid smoke to enhance the smoky notes in your chili seasoning.
Other Delicious Ways to Use Chili Seasoning
Homemade chili seasoning isn’t just for chili! Its bold, savory flavors make it an incredibly versatile spice blend that can enhance a wide variety of dishes. From tacos to soups, steaks, and even popcorn, chili seasoning can be used in countless ways to add depth, warmth, and a spicy kick to any meal. Below are some creative and delicious ways to use your chili seasoning in everyday cooking.
1. Tacos: Bold, Flavorful Filling for Any Taco
Chili seasoning is a perfect addition to taco fillings, whether you’re using ground beef, chicken, turkey, or even vegetarian options like beans or tofu. The seasoning enhances the meat’s flavor and gives it a hearty, smoky base. Here’s how you can incorporate it:
How to Use Chili Seasoning in Tacos:
For Meat: Brown your ground beef, chicken, ground turkey, or pork in a skillet. Once the meat is cooked through, drain any excess fat if necessary. Add about 2 to 3 tablespoons of chili seasoning per pound of meat and stir to coat the meat evenly with the spices.
Add Liquids: For a saucier filling, add a splash of water, tomato paste, or salsa to the meat and seasoning mixture. Let it simmer for a few minutes to create a rich, flavorful taco filling.
For Vegetarian Tacos: Use chili seasoning to flavor black beans, refried beans, or sautéed tofu for a hearty vegetarian taco filling. Add a little vegetable broth or tomato paste to create a saucy, rich texture.
Taco Variations:
Spice it up with some cayenne pepper or chipotle powder if you like your tacos extra hot.
Add a touch of lime juice for freshness and balance the richness of the chili seasoning.
2. Soups: A Flavorful Base for All Kinds of Soups
Chili seasoning is a fantastic way to add depth and richness to various types of soups, from vegetable soups to bean soups and meat-based stews. The combination of spices will enhance the savory flavors and provide a deliciously warm base for your soup.
How to Use Chili Seasoning in Soups:
Start with Sautéed Aromatics: Sauté onions, garlic, and celery in a pot with some oil until softened. Then, add your chili seasoning mix to the vegetables to allow the spices to bloom and release their aromatic flavors.
Add Broth and Vegetables: Pour in vegetable broth or chicken broth along with your choice of vegetables (e.g., carrots, potatoes, tomatoes, or corn). Stir in 2 tablespoons of chili seasoning (or more depending on the size of the soup) and let the soup simmer for 20-30 minutes to allow the flavors to meld.
For Bean-Based Soups: Add black beans, kidney beans, or chickpeas to your soup for a hearty texture. Chili seasoning enhances the flavor of the beans and brings the soup to life.
Soup Variations:
For a spicy, creamy soup, add a can of coconut milk or a splash of cream to create a silky texture. Top with fresh cilantro or a squeeze of lime for added brightness.
Tomato-based soups, like tomato bisque, can benefit from a teaspoon or two of chili seasoning to add warmth and complexity, balancing the acidity of the tomatoes.
3. Stews: Rich, Flavorful Stew Base
Chili seasoning can turn an ordinary stew into a rich, flavorful dish. Whether you’re making beef stew, chicken stew, or a hearty vegetable stew, chili seasoning enhances the natural flavors of the ingredients, creating a robust, savory base.
How to Use Chili Seasoning in Stews:
Sear the Meat: Start by searing beef stew meat, chicken thighs, or other meats in a large pot with some oil. Once browned, remove the meat and set it aside.
Sauté Vegetables and Add Chili Seasoning: In the same pot, sauté onions, carrots, celery, and garlic. Once softened, add about 1-2 tablespoons of chili seasoning to the vegetables, stirring to coat them in the spices. This step helps to release the essential oils in the spices and intensify the flavor.
Add Stock and Simmer: Pour in your choice of beef stock, chicken stock, or vegetable stock along with your meat and any additional vegetables you like (e.g., potatoes, parsnips, green beans, or peas). Let the stew simmer for at least an hour to allow the flavors to develop.
Stew Variations:
For a spicy kick, add extra cayenne pepper or jalapeño slices.
Root vegetables like sweet potatoes or butternut squash work wonderfully in stews and pair well with the smoky, spicy notes of the chili seasoning.
4. As a Meat Rub: Perfect for Grilled or Roasted Meats
Chili seasoning also makes an excellent rub for grilled or roasted meats, from chicken wings to steaks and pork ribs. The spices create a flavorful crust and add a smoky, spicy kick to the meat.
How to Use Chili Seasoning as a Rub:
Prep the Meat: Pat your chicken, pork, beef, or tofu dry with paper towels to ensure the rub sticks. You can use any cut, such as chicken breasts, pork chops, ribs, or steaks.
Apply the Rub: Coat the meat generously with your homemade chili seasoning. Rub it in with your hands to ensure an even coating. For extra flavor, drizzle a little olive oil or lime juice on the meat before applying the rub to help it adhere and enhance the flavor.
Rest and Grill: Allow the meat to rest with the rub for 30 minutes to an hour before grilling or roasting. This helps the spices to penetrate the meat and gives you a more flavorful dish.
Cook and Serve: Grill or roast the meat as desired, and enjoy the rich, spicy flavors imparted by the chili seasoning.
Meat Rub Variations:
For a sweet and spicy rub, add a small amount of brown sugar to the seasoning mix to create a caramelized crust when grilling.
Garlic powder, smoked paprika, or chipotle powder can be added to deepen the flavor and enhance the smoky notes.
5. Popcorn: A Spicy Snack
Chili seasoning isn’t just for savory meals; it also makes a fantastic topping for popcorn, turning a simple snack into a bold, spicy treat.
How to Use Chili Seasoning on Popcorn:
Pop the Popcorn: Start by popping your popcorn in a popcorn maker, on the stovetop, or in the microwave.
Season the Popcorn: While the popcorn is still warm, drizzle a little melted butter or olive oil over it. Then sprinkle on chili seasoning to taste—about 1 teaspoon per serving should be enough to add a nice kick.
Mix and Serve: Toss the popcorn well to ensure the seasoning is evenly distributed. You can also sprinkle parmesan cheese or lime zest for added flavor.
Storing and Preserving Your Chili Seasoning
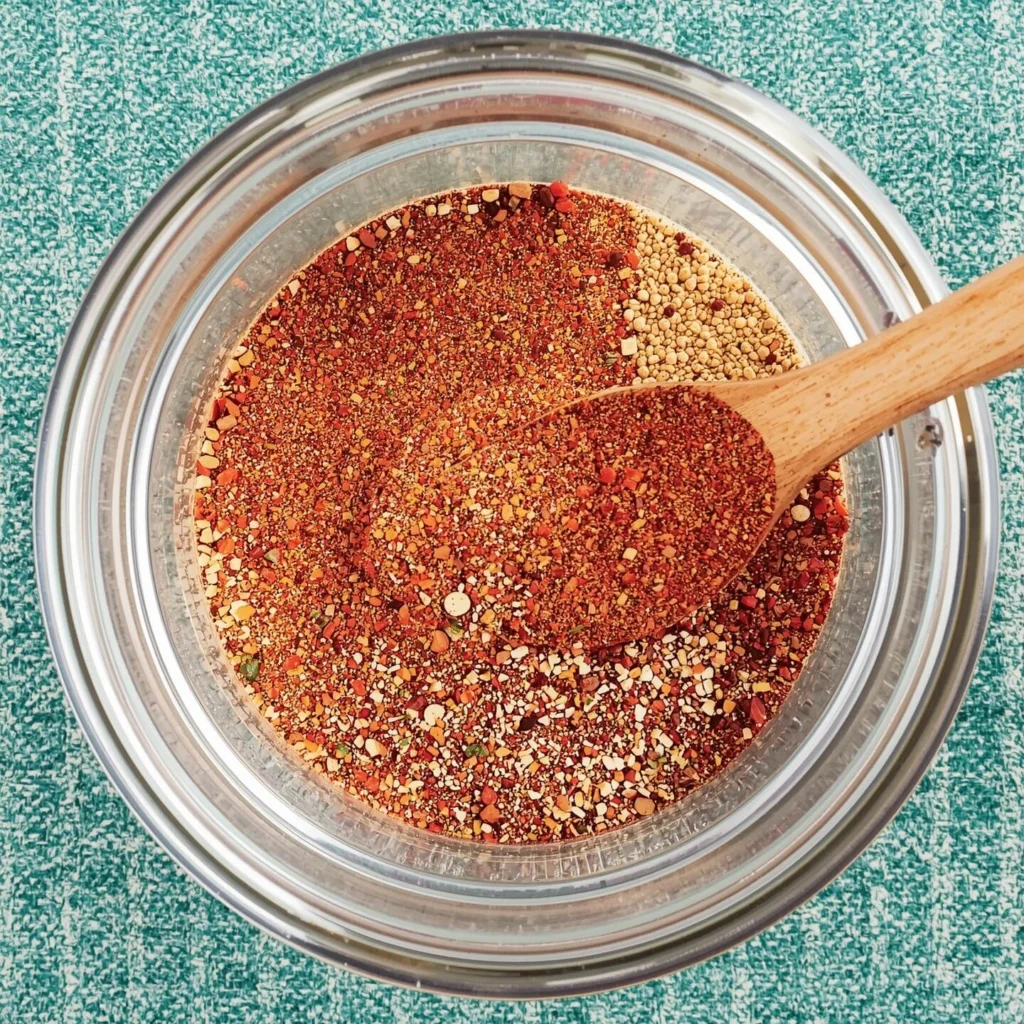
A close-up shot of homemade chili seasoning with a wooden spoon, showcasing a mix of red chili flakes, pepper, and other spices in a glass jar.
Best Storage Methods for Homemade Chili Seasoning
Storing your homemade chili seasoning properly is essential to maintaining its freshness and flavor. While it may seem simple to toss it in any container, the way you store your seasoning can significantly impact its shelf life and potency. Proper storage helps preserve the aromatic oils in the spices and prevents them from losing their flavor over time. Here are some best practices for storing your homemade chili seasoning, along with helpful tips for keeping it fresh:
1. Use Airtight Containers for Long-Lasting Freshness
One of the most important factors in storing chili seasoning is to ensure that the container is airtight. Exposure to air can cause spices to lose their potency, especially the essential oils that give chili seasoning its robust flavor. Oxygen can also cause the seasoning to become stale or even lose some of its heat.
Best Storage Containers:
Glass Jars: Glass jars with airtight seals are ideal for storing homemade chili seasoning. Glass is non-reactive, meaning it won’t absorb flavors from the seasoning or impart any of its own. Look for mason jars or other glass containers with tight-fitting lids. These are easy to label, and they keep the seasoning sealed off from air and moisture.
Tip: You can find small glass jars that are perfect for storing spices. They’re not only functional but also aesthetically pleasing if you like to keep your spices organized and visible in your kitchen.
Plastic Spice Containers: If you don’t want to use glass, plastic spice containers with airtight lids are a great option. Many spice containers are designed to be shatterproof, which can be an advantage if you’re worried about glass breaking.
Tip: Choose BPA-free plastic containers to avoid any potential chemical reactions with the spices over time.
Why Airtight Containers Work:
Prevents moisture: Moisture is a major factor in spice degradation. Airtight containers prevent humidity from getting into the seasoning, keeping it dry and fresh.
Keeps the flavor sealed in: By minimizing air exposure, airtight containers ensure the essential oils in the spices remain intact for longer periods.
2. Store in a Cool, Dark Place
Light and heat can cause chili seasoning to lose its vibrancy and freshness more quickly. Exposure to direct sunlight, even through glass containers, can break down the flavor compounds in the spices, causing them to lose their aroma and potency. Similarly, storing chili seasoning near heat sources like stoves or windows can accelerate this process.
Best Location for Storage:
Pantry or Spice Cabinet: Store your chili seasoning in a cool, dark cupboard or spice rack away from the stove, oven, or direct sunlight. A pantry that is away from any heat sources is ideal.
Drawer Storage: If you prefer not to use a spice rack, a drawer that remains closed and dark can also provide a good storage environment for your seasoning.
Tip: Avoid keeping your spices in bright or high-traffic areas where sunlight or warmth from cooking might affect them.
Why Cool and Dark is Best:
Prevents degradation: Heat and light break down essential oils and other compounds that contribute to the flavor of the seasoning, making it lose its potency over time.
Longer shelf life: Storing your chili seasoning in a cool, dark environment slows down the oxidation process, helping your spices last longer.
3. Use Spice Shakers or Containers with a Measuring Cap
If you use chili seasoning frequently, consider transferring it to spice shaker containers or containers with built-in measuring capabilities. This makes it easier to dispense the right amount of seasoning without opening the container repeatedly, which can expose it to air.
Options for Spice Shakers:
Plastic or Glass Spice Shakers: You can purchase spice shaker containers with adjustable holes for pouring or sprinkling. These containers make it easier to shake out the right amount of seasoning without touching the mix and contaminating it.
Flip Top Lids: Containers with flip top lids are also a good option for ease of use and to maintain a tight seal when not in use.
Why Spice Shakers Work:
Convenience: Spice shakers make it quick and easy to use your chili seasoning without needing to open the container every time.
Minimizes exposure: Using a container with a built-in pouring or shaking mechanism means less frequent exposure to air and moisture.
4. Labeling Your Containers
Labeling your storage containers is a helpful practice for identifying the seasoning and tracking freshness. Even if you are using airtight jars or containers, it’s easy to forget when you made the seasoning mix, and spices do lose their potency over time.
Labeling Tips:
Include the date: Always write the date of preparation on the label. A simple note like “Made on [Date]” will help you track how long the seasoning has been stored.
Include ingredients: For easy reference, consider including the main ingredients on the label (e.g., “chili powder, cumin, paprika”). This will help you remember the mix and ensure you don’t accidentally use the wrong seasoning.
Label for use: If you plan to give homemade chili seasoning as gifts, a simple label with instructions on how much to use can be helpful.
Why Labeling is Important:
Track freshness: Knowing when you made your seasoning mix helps you determine its shelf life and when it might be time to refresh it with a new batch.
Easy identification: Labeling helps you easily spot the chili seasoning mix in a crowded pantry or spice rack.
5. Keep it Away from Moisture
Moisture is one of the biggest enemies of spice storage. Any exposure to moisture can lead to clumping, molding, or flavor degradation in your seasoning mix. Ensuring your chili seasoning stays dry will help maintain its texture and potency.
Tips for Avoiding Moisture:
Store away from steam: Don’t store your chili seasoning near your sink, stove, or anywhere steam may accumulate. The humidity from cooking or washing dishes can cause moisture to settle in your spice containers, which can negatively affect the seasoning.
Desiccants: For extra protection, you can place a food-safe desiccant packet or silica gel inside the container to absorb any moisture that may build up over time. This is particularly useful for larger batches.
Why Avoiding Moisture Matters:
Prevents mold: Moisture can cause mold growth in your seasoning mix, making it unsafe to use. Keeping the seasoning dry ensures it stays safe and flavorful for months.
Prevents clumping: Moisture can also cause your seasoning to clump together, making it harder to use and distribute evenly in recipes.
How Long Does Homemade Chili Seasoning Last?
One of the great advantages of making your own chili seasoning at home is that you can control the ingredients, ensuring that it’s fresh and free of preservatives. However, like any spice blend, homemade chili seasoning will eventually lose its potency over time. To get the best flavor and maintain the seasoning’s effectiveness, it’s important to understand how long it lasts, how to tell if it’s still good to use, and when to replace it.
1. Shelf Life of Homemade Chili Seasoning
The shelf life of your homemade chili seasoning depends primarily on the freshness of the spices you use and how well you store the mix. Generally speaking, when stored properly in an airtight container in a cool, dark place, homemade chili seasoning will remain fresh and flavorful for 6 months to 1 year.
Factors that Affect Shelf Life:
Quality of Spices: The fresher the spices you use, the longer your seasoning mix will retain its flavor. Spices lose their potency over time, so it’s best to use fresh, high-quality spices when making your chili seasoning.
Storage Conditions: As mentioned earlier, light, heat, and moisture can all degrade the quality of your seasoning. Storing your seasoning in airtight containers and in a cool, dark place will help preserve its flavor.
Container Type: Glass jars with airtight seals or spice containers with tight-fitting lids are ideal for keeping your chili seasoning fresh. Avoid using containers that allow air or moisture to enter, as this will accelerate flavor loss.
2. How to Tell If Your Chili Seasoning Is Still Good
While chili seasoning doesn’t spoil in the traditional sense (like perishable food), it can lose its potency and flavor over time. Here’s how to tell if your homemade chili seasoning is still good to use:
1. Loss of Aroma:
How to Check: Open the container and take a sniff. Fresh chili seasoning should have a robust, aromatic scent. If it no longer smells strong or the scent is faint, the spices have likely lost their potency. A lack of fragrance indicates that the essential oils have evaporated, which means the seasoning may not provide the same bold flavor in your dish.
What to Do: If your chili seasoning smells weak, it’s likely time to replace it with a fresh batch. You can also try replacing individual spices that have lost their fragrance (like cumin or chili powder) and refresh the mix.
2. Dull or Faded Color:
How to Check: Check the color of your chili seasoning. Chili powder, paprika, and other spices should retain their vibrant color. If the seasoning looks dull or faded, especially the reds of chili powder or paprika, it’s a sign that the spices have lost their freshness.
What to Do: Dull color means the seasoning has lost its potency. While it’s still safe to use, it will have less flavor, so you might want to refresh it or start a new batch.
3. Flavor Loss:
How to Check: If you’ve had your seasoning for a while, you can also do a quick taste test. Take a small pinch of the seasoning and taste it. Does it have the bold, vibrant flavors you expect from chili seasoning? If it tastes bland, flat, or lacking in heat, it has probably lost its potency and won’t give your chili the same rich flavor it used to.
What to Do: If the flavor has dulled, it’s best to make a new batch. You can also try adding a little more fresh chili powder, cayenne, or garlic powder to the old batch, but this is a temporary fix. For the best results, a fresh mix is recommended.
4. Clumping or Changes in Texture:
How to Check: Occasionally, homemade chili seasoning can clump together due to moisture. This can happen if the container isn’t airtight or if it’s stored in a humid environment. If the seasoning has clumps, it might be a sign that moisture has gotten in, which can lead to mold or spoilage over time.
What to Do: If your seasoning has clumps, break them up by gently tapping the container or using a spoon. If the clumps remain or you notice any mold growth or off smells, discard the seasoning immediately. Make sure the container is properly sealed to prevent future clumping.
3. Tips for Extending the Freshness of Your Chili Seasoning
While homemade chili seasoning is best used within 6 months to a year, there are a few tips you can follow to maximize its freshness and flavor for as long as possible:
1. Store in Small Batches:
Why: If you make a large batch of chili seasoning, consider dividing it into smaller containers. This way, you only expose a small portion to air and light when you open the container, while the rest stays sealed. This can help preserve the seasoning for a longer period.
Tip: Store the majority of your chili seasoning in a larger airtight jar and use a smaller shaker or jar for daily use. This helps keep the main batch sealed and fresh.
2. Use Desiccants:
Why: To avoid moisture from affecting the seasoning, you can place a silica gel packet or food-safe desiccant inside the jar or container. This will help absorb any moisture that may enter the container, keeping the spices dry and fresh.
Tip: Be sure to use only food-safe desiccants designed for spice storage to avoid contamination.
3. Keep it Away from Heat and Light:
Why: As mentioned earlier, heat and light can degrade the quality of your chili seasoning. Store it in a cool, dark pantry or cupboard, away from heat sources like stoves or windows, which can expose the seasoning to light and warmth.
Tip: A kitchen drawer or pantry with minimal light exposure is ideal for keeping chili seasoning fresh.
4. Don’t Add Moisture:
Why: Introducing any moisture into your chili seasoning can cause it to spoil quickly. Be mindful when using the seasoning to avoid getting any liquid or wet spoons in the container.
Tip: Always use dry utensils when scooping out your seasoning, and avoid touching it with wet hands or spoons.
Chili is a beloved dish across the world, perfect for cozy nights in or feeding a crowd. Start with homemade chili seasoning—it’s a game-changer in terms of flavor.
Link to External Cooking Tutorials and Videos:
Sometimes, a YouTube video or tutorial from a trusted chef or culinary institution can provide additional value to your readers. Linking to these resources can help your users understand how to implement certain techniques or recipes.
Example:
“If you’re new to making homemade chili, watch this YouTube tutorial on how to cook the perfect chili from the Cooking Channel for step-by-step guidance.”